Embedding Bold BI Dashboards in an Angular Application

Introduction
Today, Angular is one of the all-time leading frameworks because of its consistent code structure and widely applicable use cases. Since its inception, Angular has come a long way, keeping up to date with the constant evolution of browsers and their capacity to enable a wide range of capabilities. It is now one of the most popular platforms for creating feature-rich web applications. Several companies and developer groups have appreciated its user interface and functionality. Many businesses have adapted previous web apps to Angular. Embedding analytics into your Angular applications is an added advantage for your business. It helps you gain critical insight with your data and become more profitable by facilitating timely business decisions.
Bold BI® helps you embed interactive dashboards in your business application in a fast and easy way with features like prebuilt data connectors, calculated metrics, and engaging data visualization. In this blog post, I am going to explain how to integrate a dashboard in an Angular application using Bold BI. These are the steps involved in this process:
- Create an Angular application
- Create a Bold BI instance to render the dashboard.
- Create an authorization server to authenticate the Bold BI server.
- Run the Angular application to see the embedded dashboard.
Step 1: Create an Angular application
First, you need to create a new Angular project in Visual Studio Code. Before creating the project, make sure to install Node in your machine. You can do this by opening the command prompt and using the command node -v as shown in the following screenshot.
node -v
After ensuring that you have installed Node on your machine, create a directory by using the command mkdir Embed-Sample in the command prompt.
mkdir Embed-Sample
Then, open Visual Studio Code with the code Embed-Sample command as shown in the following screenshot.
code Embed-Sample
After Visual Studio Code is launched, you need to open a terminal to install the Angular CLI. You can open a terminal by clicking Terminal > New Terminal at the top of the IDE. Then, install the Angular CLI using the command npm install -g @angular/cli.
npm install -g @angular/cli
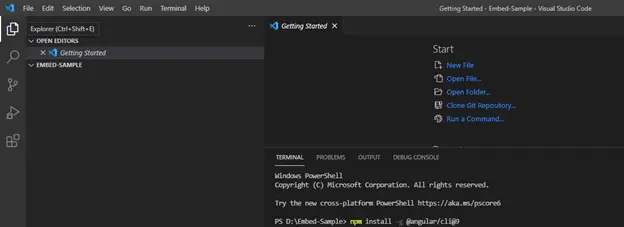
Next, you need to create a new project named angular-sample by using the command ng new angular-sample in the terminal.
ng new angular-sample
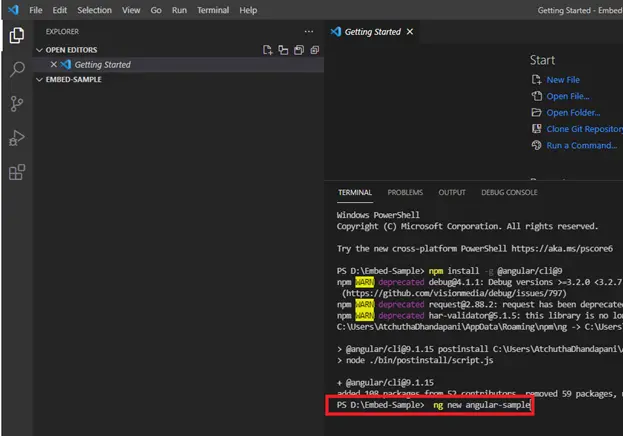
You will be prompted to choose Angular routing and stylesheet format. You can choose Yes or No for Would you like to add Angular routing? and should choose CSS for Which stylesheet format would you like to use? Then, press Enter.

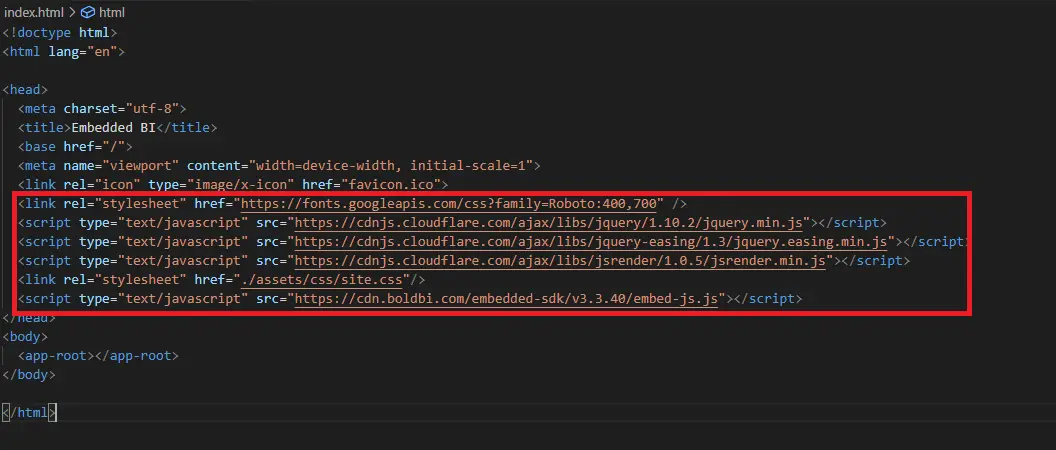
The package installation will begin, and it will take a few minutes. Once the installation is done, you will get the message Package installed successfully. Next, you need to create a script file to proceed further. To create a proper script file, you need to add the necessary script and style references in the index.html file, as shown in the following image.
<html>
<html lang="en">
<head>
<meta charset="utf-8">
<title>Embedded BI</title>
<base href="/">
<meta name="viewport" content="width=device-width, initial-scale=1">
<link rel="icon" type="image/x-icon" href="favicon.ico">
<link rel="stylesheet" href="https://fonts.googleapis.com/css?family=Roboto:400,700" />
<script type="text/javascript" src="https://cdnjs.cloudflare.com/ajax/libs/jquery/1.10.2/jquery.min.js"></script>
<script type="text/javascript" src="https://cdnjs.cloudflare.com/ajax/libs/jquery-easing/1.3/jquery.easing.min.js"></script>
<script type="text/javascript" src="https://cdnjs.cloudflare.com/ajax/libs/jsrender/1.0.5/jsrender.min.js"></script>
<link rel="stylesheet" href="./assets/css/site.css" />
<script type="text/javascript" src="https://cdn.boldbi.com/embedded-sdk/v3.3.40/embed-js.js"></script>
</head>
<body>
<app-root></app-root>
</body>
</html>
And add the necessary ts files to the project as shown in the following image.
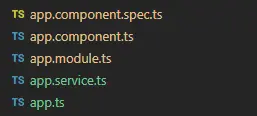
For more guidance, refer to the sample code in the Bold BI documentation.
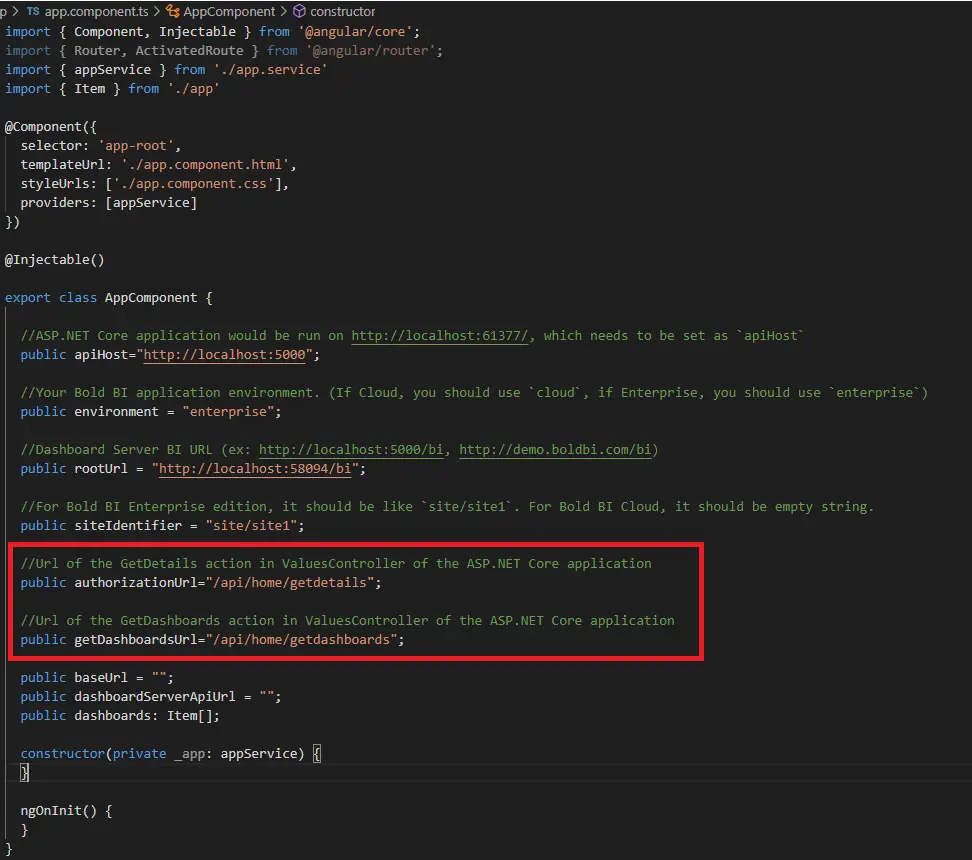
In this demonstration, the Angular application acts as a client, and an ASP.NET Core application acts as a server. You need to add the several properties in the app.component.ts file as shown in the following table and screenshot.
| Properties | Property Value Descriptions |
| RootUrl | Bold BI dashboard server URL. Example: https://localhost:58094/bi. |
| SiteIdentifier | For Bold BI Enterprise, it should follow the format `site/site1`. For Bold BI Cloud, it should be an empty string. |
| Environment | Your Bold BI application environment. If using Bold BI Cloud, you should use `cloud`. If using Bold BI Enterprise, you should use `enterprise`. |
| apiHost | ASP.NET Core application would be run on https://localhost:5000/, which needs to be set as `apiHost` |
import { Component, Injectable } from '@angular/core';
import { Router, ActivatedRoute } from '@angular/router';
import { appService } from './app.service';
import { Item } from './app';
@Component({
selector: 'app-root',
templateUrl: './app.component.html',
styleUrls: ['./app.component.css'],
providers: [appService]
})
@Injectable()
export class AppComponent {
//ASP.NET Core application would be run on http://localhost:61777/, which needs to be set as "apiHost"
public apiHost = "http://localhost:5000";
//Dashboard Server BI URL (ex: http://localhost:5000/, https://demo.boldbi.com/bi/)
public rootUrl = "http://localhost:5000/bi";
//For Bold BI Enterprise edition, it should be like 'site/site'. For Bold BI Cloud, it should be empty string.
public siteIdentifier = "site/site1";
//Url of the GetDetails action in ValuesController of the ASP.NET Core application
public authorizationUrl = "/api/home/getdetails";
//Url of the GetDashboards action in ValuesController of the ASP.NET Core application
public getDashboardUrl = "/api/home/getdashboards";
public baseUrl = "";
public dashboardServerApiUrl = "";
public dashboards: Item[];
constructor(private _app: appService) {
}
ngOnInit() {
}
}

After adding the above properties, we need to create the Bold BI instance.
Step 2: Create a Bold BI instance to render the dashboard
After creating the Angular application, you need to create a Bold BI instance that calls the authorization end point implemented in the embedding application to communicate between the server side (any web application) and the client side (Angular application), which allows us to embed a Bold BI dashboard in the Angular application. To create a Bold BI instance, first, you need to create a dashboard-listing.component.ts file to define the renderDashboard method for creating a Bold BI instance and embedding the dashboard.
renderDashboard(dashboard: Item) {
    this.dashboard = BoldBI.create({
        serverUrl: this._appComponent.baseUrl,
        dashboardId: dashboard.Id,
        embedContainerId: "dashboard",
        width: "100%",
        height: "100%",
        authorizationServer: {
            url: this._appComponent.apiHost + this._appComponent.authorizationUrl
        },
        autoRefreshSettings: {
            enabled: true,
            hourlySchedule: {
                hours: 0,
                minutes: 1,
                seconds: 0
            }
        },
        actionBegin: "embedDashboardActionBegin",
        actionComplete: "embedDashboardActionComplete"
    });
    console.log(this.dashboard);
    this.dashboard.loadDashboard();
}
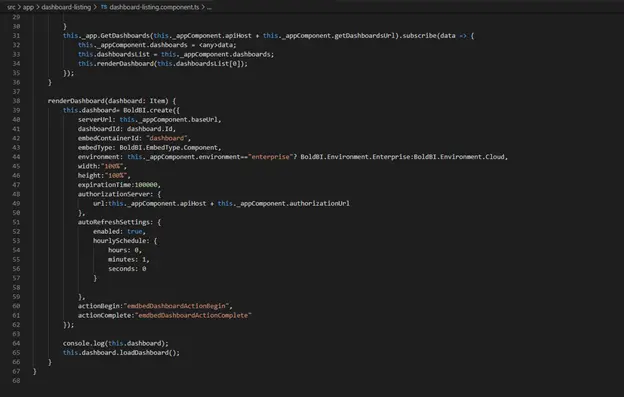
Next, you need to create a dashboard-listing.component.html file to render the embedded dashboard and add the CSS in the site.css file. Once the necessary changes have been done on the client side, then you can create the authorization server using a web application. So, now you need to create an authorization server to support authenticating the Bold BI server.
Step 3: Create an authorization server to authenticate the Bold BI server
Every application that embeds a Bold BI dashboard or widget must be authorized with the Bold BI server, and this authentication step requires sending confidential information to the Bold BI server, such as user email, group data, and embed signature. So, in your server application, implement this authentication flow and provide the URL for connecting to your server in the Bold BI instance.
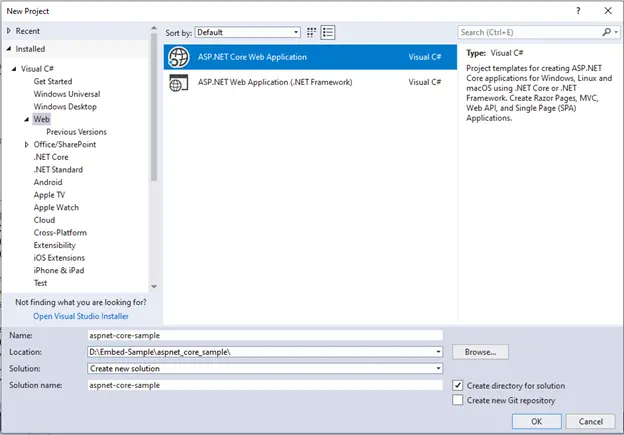
To create a server-side application, you need to open Microsoft Visual Studio and create a New Project. You can use any web application for creating an authorization server. Here, we are using an ASP.NET Core application. If you’re following our procedure, choose ASP.NET Core Web Application, provide a project name, and click OK.
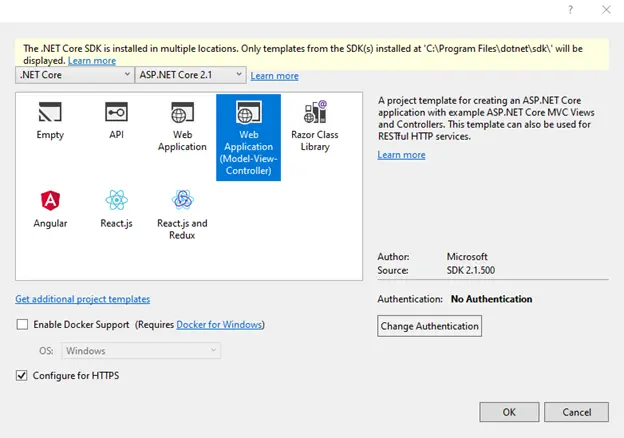
Next, you need to choose the Web Application (Model-View-Controller) template from the project template window and click OK.
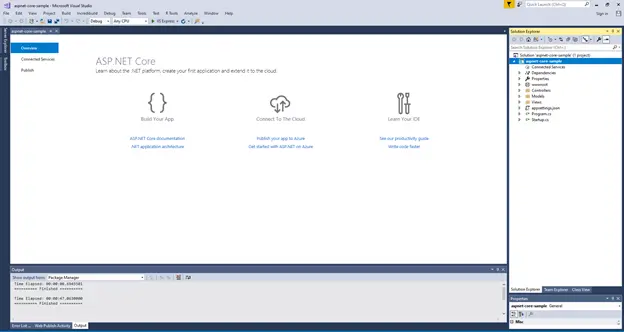
Now, the ASP.NET Core application is created.
After the ASP.NET Core application is created, you need to create classes named EmbedProperties and DataClass under Models and add the required variables.
namespace Syncfusion.Server.EmbedProperties.Models;
{
public class EmbedProperties {

// Bold BI dashboard server URL. For example: https://localhost:5000/bi or https://dashboard.syncfusion.com/bi.
public static string RootUrl = https://localhost:5000/bi;

// For Bold BI Enterprise, it should be something like “site/site1”.For Bold BI Cloud, it should be an empty string.
public static string SiteIdentifier = “site/site1”;

// User email of the admin in your Bold BI server, which would be used to retrieve the dashboards list.
public static string UserEmail = “User Email here";

// Password of the admin in Bold BI, which would be used to retrieve the dashboards list.
public static string UserPassword = “User Password here”;

// You can obtain your EmbedSecret key from Bold BI. Please refer to the Embed Settings.
public static string EmbedSecret = “Embed secret here”;
}
}
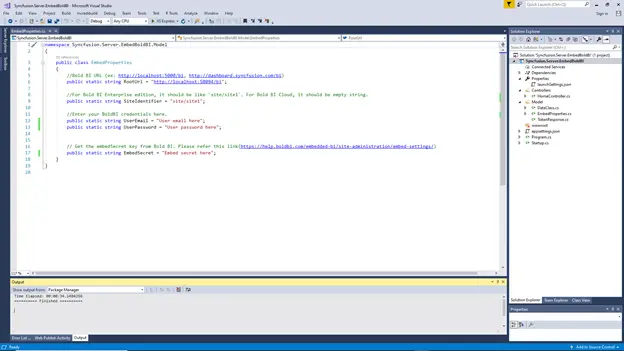
In the EmbedProperties.cs file of the ASP.NET Core application, you need to set the RootUrl, SiteIdentifier, UserEmail, UserPassword, and EmbedSecret properties.
| Properties | Property Value Descriptions |
| RootUrl | Bold BI dashboard server URL. For example: https://localhost:5000/bi or https://dashboard.syncfusion.com/bi. |
| SiteIdentifier | For Bold BI Enterprise, it should be something like “site/site1”.For Bold BI Cloud, it should be an empty string. |
| UserEmail | User email of the admin in your Bold BI server, which would be used to retrieve the dashboards list. |
| UserPassword | Password of the admin in Bold BI, which would be used to retrieve the dashboards list. |
| EmbedSecret | You can obtain your EmbedSecret key from the Embed tab in the Bold BI server by enabling Enable embed authentication in the Administration page. Please refer to the Embed Settings for additional details. |
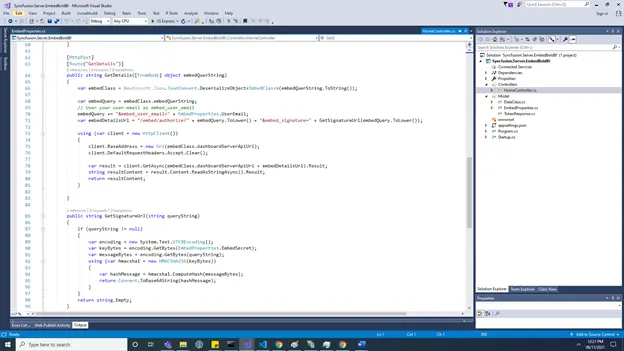
After generating and saving the secret key, add the necessary functions to get dashboards from the Bold BI server in the HomeController.cs file as shown in the following image.
[HttpPost]
[Route("AuthorizationServer")]
    public string AuthorizationServer([FromBody] object embedQuerString)
    {
        var embedClass = Newtonsoft.Json.JsonConvert.DeserializeObject(embedQuerString.ToString());

        var embedQuery = embedClass.embedQuerString;
        // User your user-email as embed_user_email
        embedQuery += "&embed_user_email=" + GlobalAppSettings.EmbedDetails.UserEmail;
        //To set embed_server_timestamp to overcome the EmbedCodeValidation failing while different timezone using at client application.
        double timeStamp = (int)DateTime.UtcNow.Subtract(new DateTime(1970, 1, 1)).TotalSeconds;
        embedQuery += "&embed_server_timestamp=" + timeStamp;
        var embedDetailsUrl = "/embed/authorize?" + embedQuery + "&embed_signature=" + GetSignatureUrl(embedQuery);

        using (var client = new HttpClient())
        {
            client.BaseAddress = new Uri(embedClass.dashboardServerApiUrl);
            client.DefaultRequestHeaders.Accept.Clear();

            var result = client.GetAsync(embedClass.dashboardServerApiUrl + embedDetailsUrl).Result;
            string resultContent = result.Content.ReadAsStringAsync().Result;
            return resultContent;
        }

    }

    public string GetSignatureUrl(string queryString)
    {
        if (queryString != null)
        {
            var encoding = new System.Text.UTF8Encoding();
            var keyBytes = encoding.GetBytes(GlobalAppSettings.EmbedDetails.EmbedSecret);
            var messageBytes = encoding.GetBytes(queryString);
            using (var hmacsha1 = new HMACSHA256(keyBytes))
            {
                var hashMessage = hmacsha1.ComputeHash(messageBytes);
                return Convert.ToBase64String(hashMessage);
            }
        }
        return string.Empty;
    }
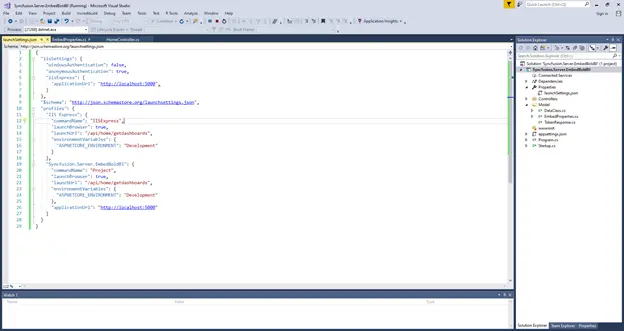
Then update the application URL and launch URL in the launchSettings.json file.
 {
    "iisSettings": {
      "windowsAuthentication": false,
      "anonymousAuthentication": true,
      "iisExpress": {
        "applicationUrl": "http://localhost:61377",
        "sslPort": 0
      }
    },
    "profiles": {
      "IIS Express": {
        "commandName": "IISExpress",
        "launchBrowser": true,
        "environmentVariables": {
          "ASPNETCORE_ENVIRONMENT": "Development"
        }
      },
      "BoldBI.Embed.Sample": {
        "commandName": "Project",
        "launchBrowser": true,
        "environmentVariables": {
          "ASPNETCORE_ENVIRONMENT": "Development"
        },
        "applicationUrl": "http://localhost:5000"
      }
    }
  }
After creating the ASP.NET Core application, you need to run it. It will launch with the dashboard details.
We have created the authorization server, and now we have to set its URL in the Angular application using the ap host variable.
Step 4: Running the Angular application to view the embedded dashboard
In the Angular application, update the authorization URL and dashboard URL that were defined in the ASP.NET core application as shown in the following image.
import { Component, Injectable } from '@angular/core';
import { Router, ActivatedRoute } from '@angular/router';
import { appService } from './app.service';
import { Item } from './app';

@Component({
    selector: 'app-root',
    templateUrl: './app.component.html',
    styleUrls: ['./app.component.css'],
    providers: [appService]
})

@Injectable()

export class AppComponent {

    //ASP.NET Core application would be run on http://localhost:61777/, which needs to be set as "apiHost"
    public apiHost = "http://localhost:5000";

    //Dashboard Server BI URL (ex: http://localhost:5000/, https://demo.boldbi.com/bi/)
    public rootUrl = "http://localhost:5000/bi";

    //For Bold BI Enterprise edition, it should be like 'site/site'. For Bold BI Cloud, it should be empty string.
    public siteIdentifier = "site/site1";

    //Url of the GetDetails action in ValuesController of the ASP.NET Core application
    public authorizationUrl = "/api/home/getdetails";

    //Url of the GetDashboards action in ValuesController of the ASP.NET Core application
    public getDashboardUrl = "/api/home/getdashboards";
    public baseUrl = "";
    public dashboardServerApiUrl = "";
    public dashboards: Item[];
    constructor(private _app: appService) {
    }
    ngOnInit() {
    }
}
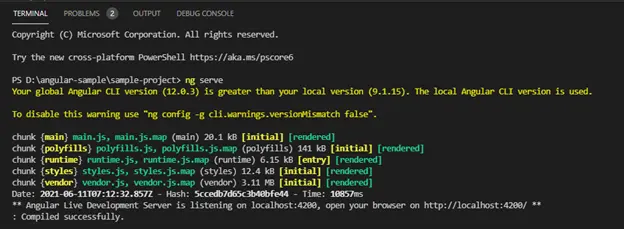
To run the Angular sample, open the integrated terminal and use the ng serve command.
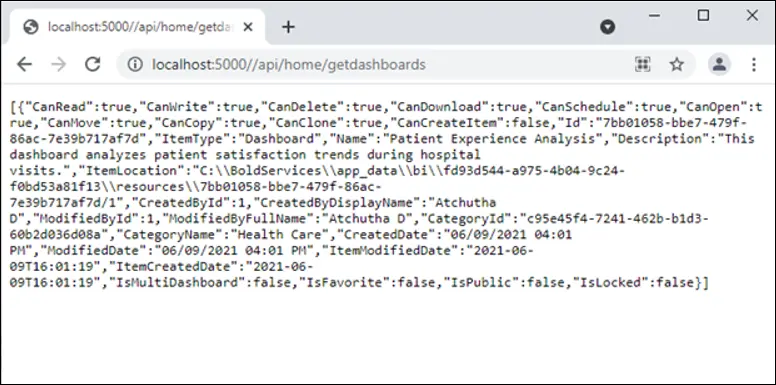
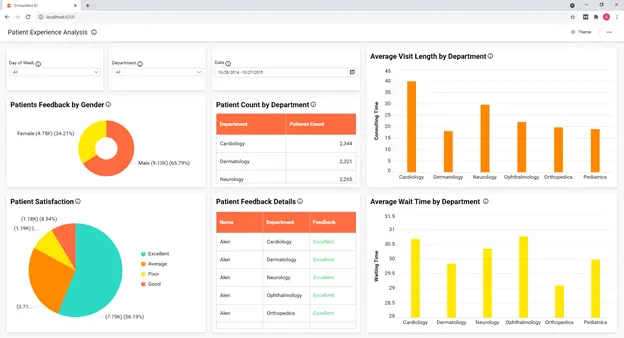
You will see the dashboard that was created in the Bold BI server embedded at the default URL of the Angular project https://localhost:4200.
Here, you can see the Patient Experience Analysis dashboard properly embedded.
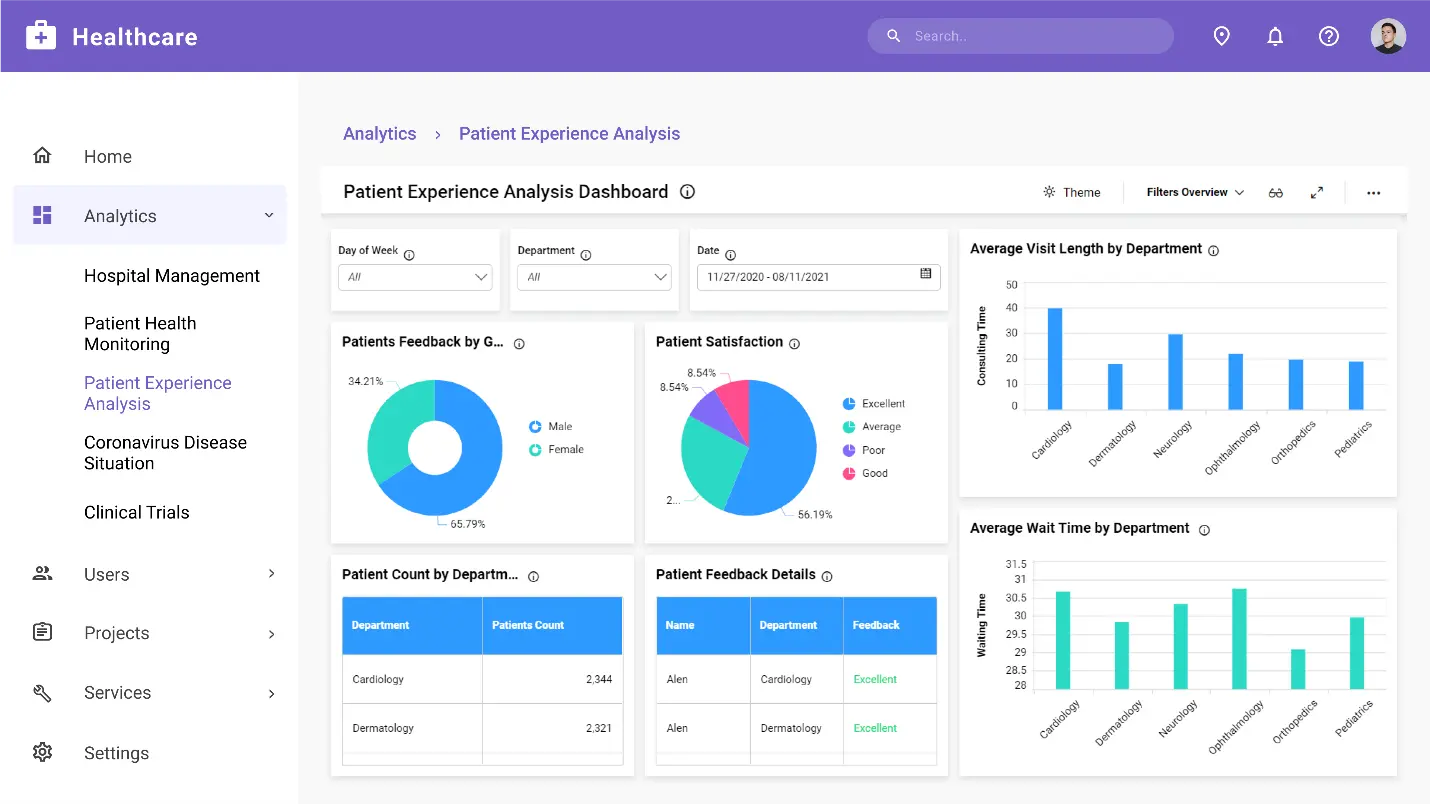
Also, you can easily embed a dashboard in a real-time website by following the previous steps. Refer to the following Bold BI video to learn about embedding a Bold BI dashboard in an Angular application in detail.
Embedding a Bold BI dashboard in an Angular application
The following image shows an example of embedding the Patient Experience Analysis dashboard in a real-time healthcare website.
You can download the code samples used in this blog from this documentation link.
Conclusion
I hope you now have a better understanding of embedding a Bold BI® dashboard in an Angular application. Bold BI helps you integrate dashboards in your applications written in ASP.NET Core, ASP.NET MVC, ASP.NET, Ruby on Rails, React with ASP.NET Core, React with Go, WinForms, and more, seamlessly. To learn more about embedding dashboards into your application, refer to this blog and our documentation.
Get started with Bold BI by signing up for a free trial and create more interactive business intelligence dashboards. If you have any questions about this blog, feel free to post them in the comment section below. You can also contact us by submitting your questions through the Bold BI website or, if you already have an account, you can log in to submit your question.