Embed Analytics in a Blazor Application Using JavaScript

TL;DR: Bold BI® lets you embed interactive dashboards in Blazor Server apps using the Bold BI JavaScript SDK and token-based embed authentication, so users can explore analytics without leaving your application.
Introduction
Users expect analytics to be available inside the tools they use every day, but building dashboard functionality from scratch is time-consuming and complex. Bold BI supports dashboard embedding in Blazor applications, enabling developers to quickly integrate interactive analytics via JavaScript embedding. In this guide, you will learn how to embed a Bold BI dashboard in a Blazor application using JavaScript embedding.
Let’s get started.
Why Embed Dashboards in Blazor Applications?
Embedded analytics brings insights directly into the application experience and closes workflow gaps. When dashboards exist in separate tools, users switch between systems, which slows workflows and reduces efficiency. Key advantages include:
- Unified user experience: Keeping dashboards within the application provides a seamless interface where users can access data without leaving their workflow.
- Faster decision-making: Real-time access to analytics enables users to take immediate action based on up-to-date insights.
- Centralized security control: Authentication and access can be managed within the application, ensuring consistent and secure data governance.
- Higher user engagement: Embedding analytics into daily workflows encourages users to interact more frequently with dashboards and insights.
- Scalability and flexibility: Embedded analytics makes it easier to extend insights across users, teams, and applications without rebuilding systems.
Next, let’s walk through the process of integrating a Bold BI dashboard into a Blazor Server application.
How to Embed a Dashboard in a Blazor Application
The following steps demonstrate how to configure embedding, set up the required components, and render dashboards in a Blazor Server application using JavaScript embedding.
Prerequisites
Before you begin, ensure the following requirements are met:
Step 1: Set Up a Blazor Server App
Start by creating a new Blazor Server project.
Create a folder in your desired location and open it in Visual Studio Code. Open the terminal and run:
dotnet new blazorserver
This will serve as the application where your dashboard will be embedded.
Step 2: Enable Embedding in Bold BI
Next, prepare your dashboard for embedding:
- Log in to your Bold BI instance
- Select the dashboard you want to embed
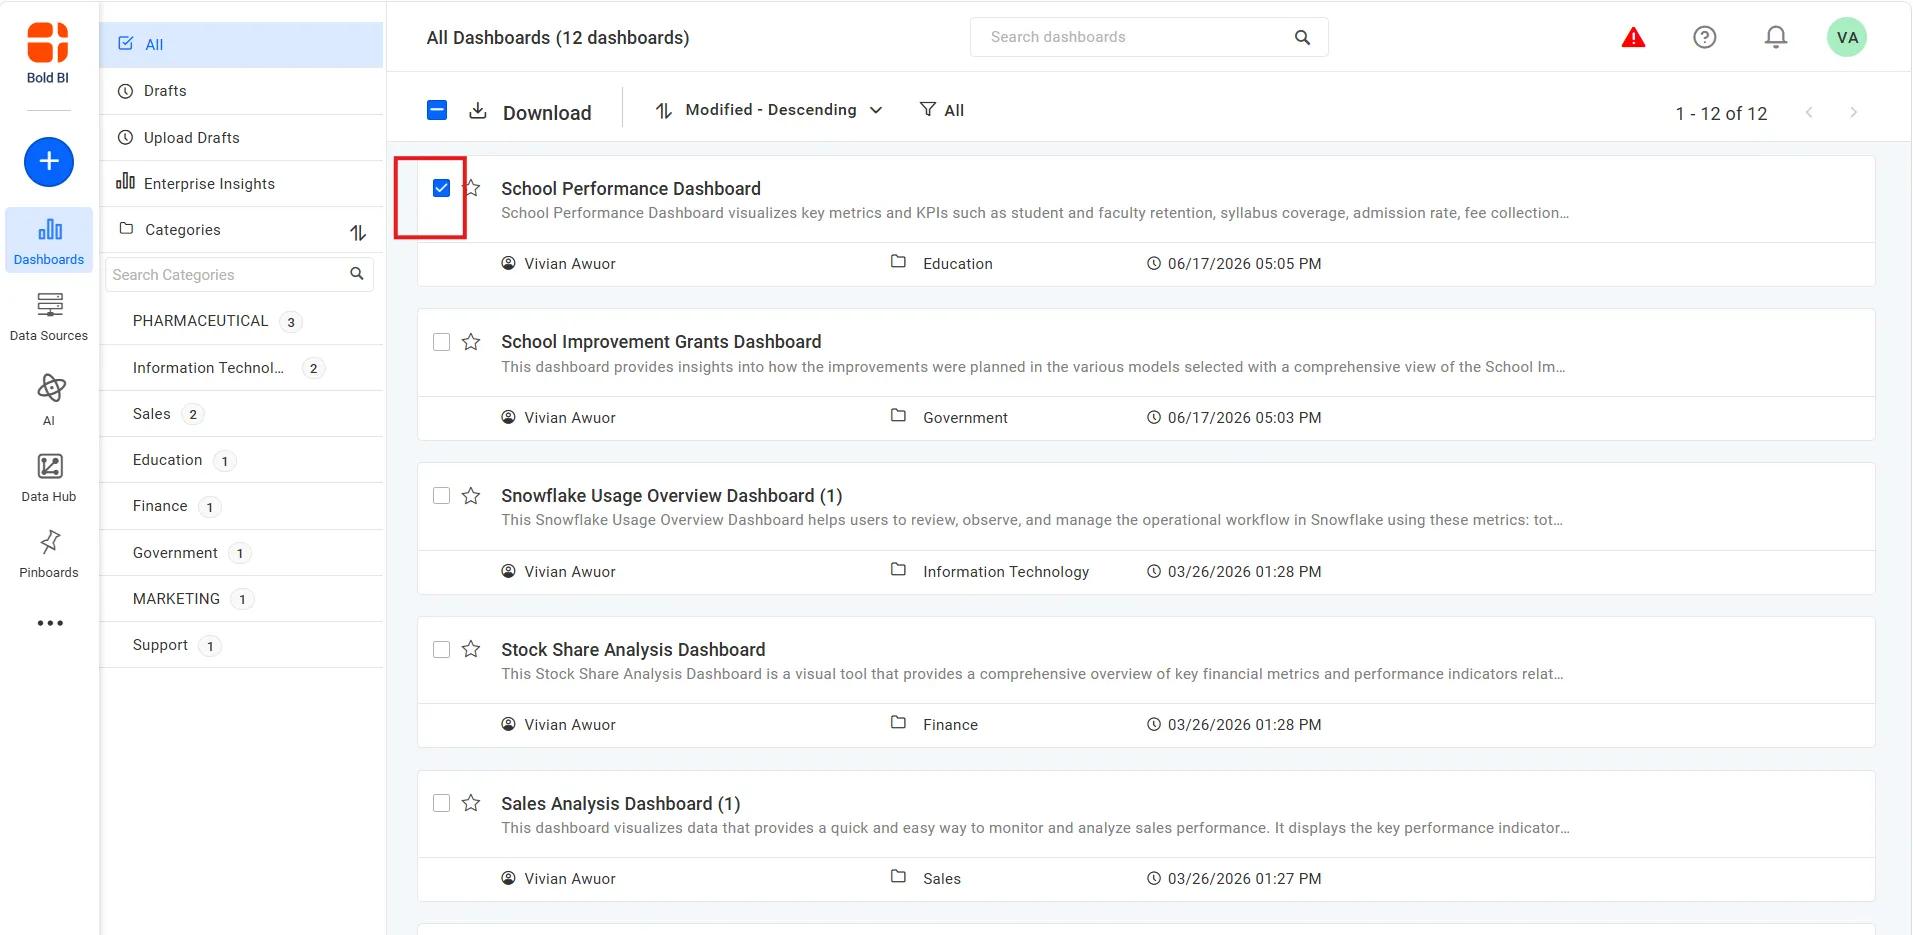
- Go to Settings → Embed
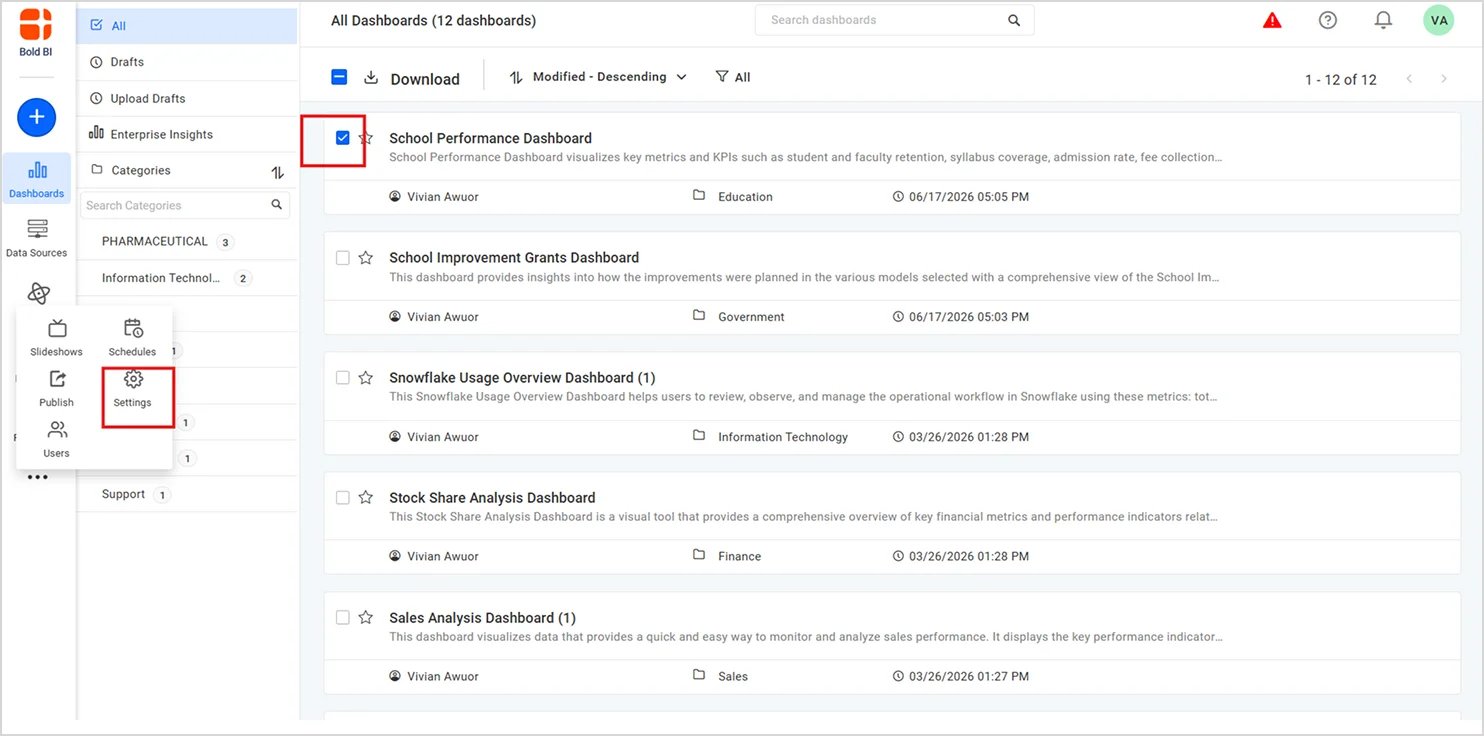
- Enable Embed Authentication
- Click Embed Configuration.
- Download embedConfig.json file.
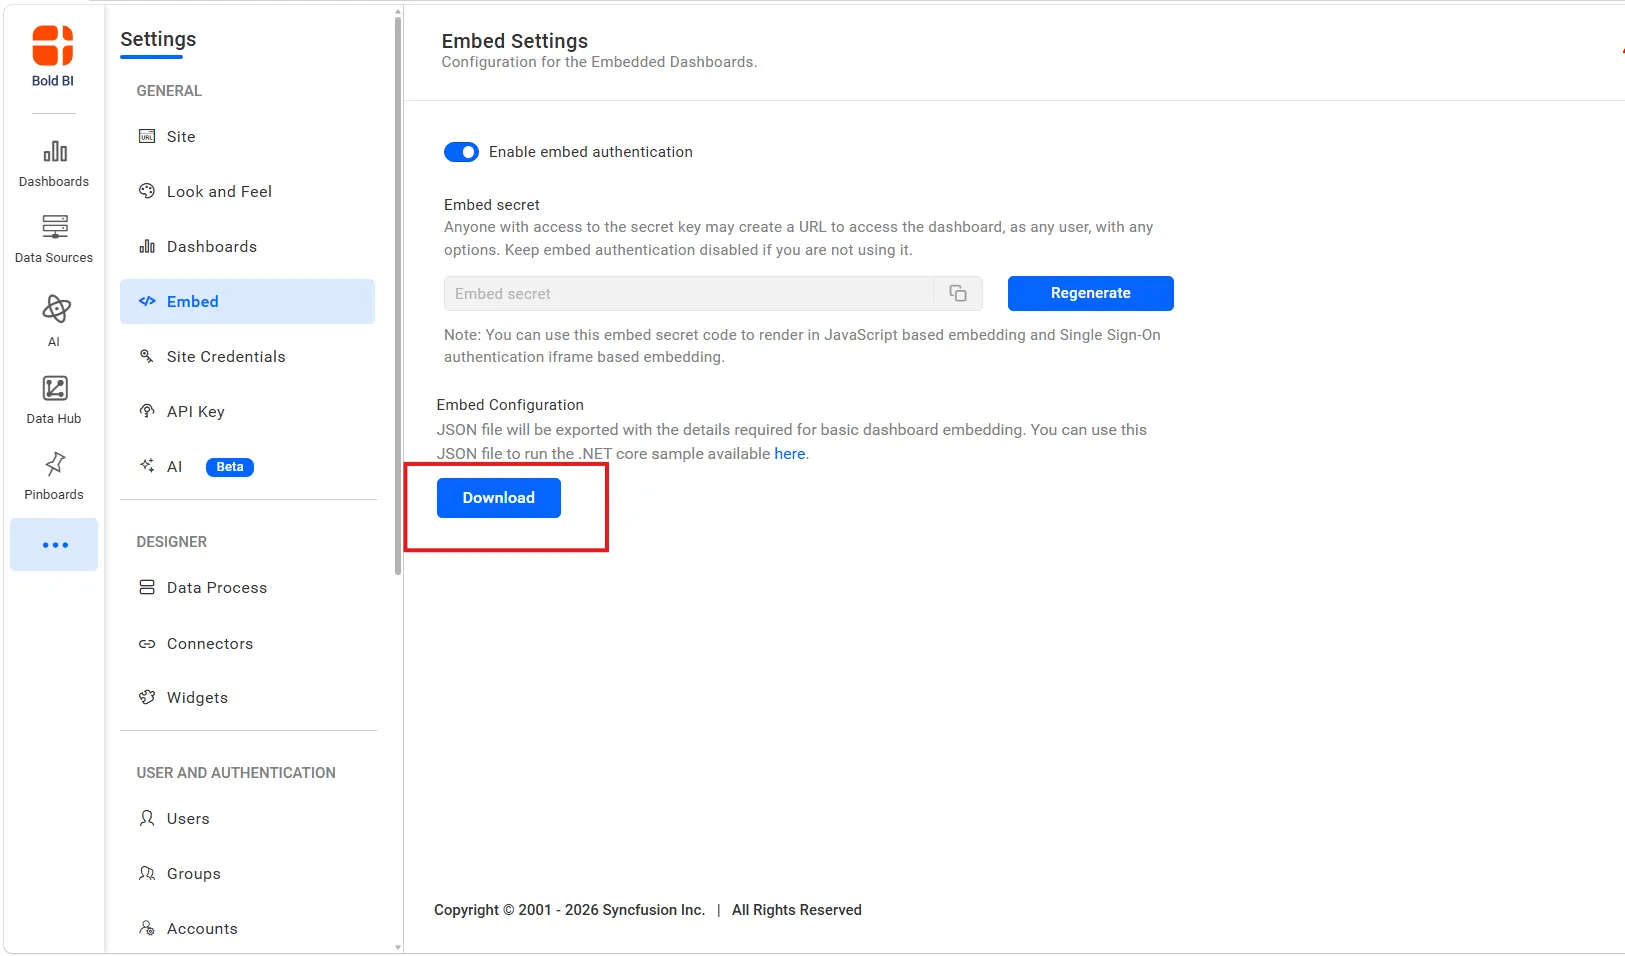
This file contains all the essential details needed to connect your app to Bold BI.
Step 3: Add the Embed Configuration File
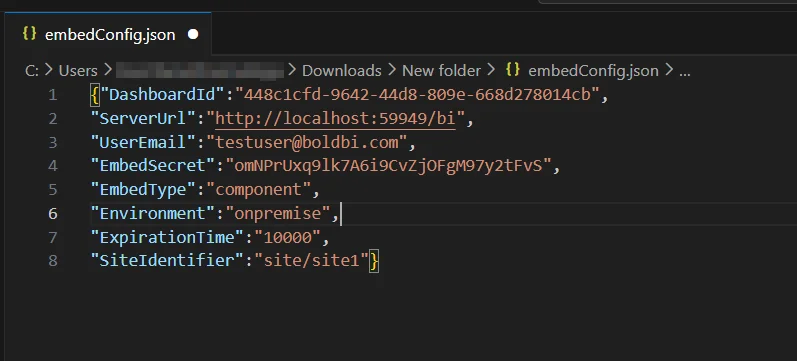
Copy the downloaded embedConfig.json file and place it in the root directory of your Blazor Server application, as shown below.

Your application will read this file to retrieve values such as:
-
- Server URL
- Dashboard ID
- User email
- Embed secret
Step 4: Create Model Classes
The application uses model classes to store the embedding configuration and dashboard details retrieved from the Bold BI server. Create a new folder named Models and add the following classes:
- EmbedClass.cs: Handles the request payload from the client.
- EmbedDetails.cs: Stores values loaded from
embedConfig.json. - GlobalAppSettings.cs: Maintains and reuses the EmbedDetails settings throughout the application.
Before creating the classes, install the required packages:
dotnet add package Newtonsoft.Json
dotnet add package System.Runtime.Serialization.Primitives
Make sure to include the required namespaces such as Newtonsoft.Json and System.Runtime.Serialization.
[DataContract]
public class EmbedClass
{
[DataMember]
public string embedQueryString { get; set; }
[DataMember]
public string DashboardServerApiUrl { get; set; }
}

public class EmbedDetails
{
public string Environment { get; set; }

public string SiteIdentifier { get; set; }

public string ServerUrl { get; set; }

public string EmbedSecret { get; set; }

public string UserEmail { get; set; }

public string EmbedType { get; set; }

public string DashboardId { get; set; }
}
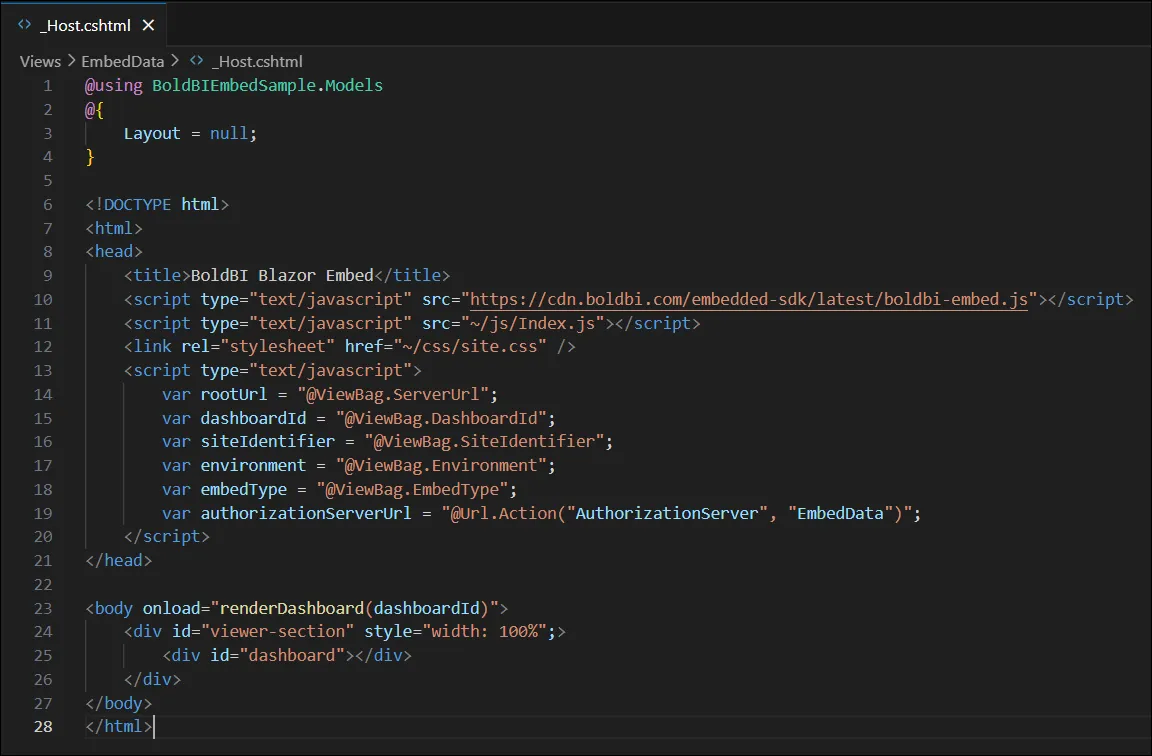
Step 5: Add the Bold BI JavaScript SDK
To render dashboards, add the Bold BI JavaScript SDK and supporting scripts to the _Host.cshtml page.
Configure the following values:
- serverUrl
- dashboardId
- siteIdentifier
- environment
- embedType
- authorizationServerUrl
Then call the renderDashboard() method to initialize and load the dashboard.
<head>
<title>BoldBI Blazor Embed</title>
<script type="text/javascript" src="https://cdn.boldbi.com/embedded-sdk/latest/boldbi-embed.js"></script>
<script type="text/javascript" src="~/js/Index.js"></script>
<link rel="stylesheet" href="~/css/site.css" />
<script type="text/javascript">
var rootUrl = "@ViewBag.ServerUrl";
var dashboardId = "@ViewBag.DashboardId";
var siteIdentifier = "@ViewBag.SiteIdentifier";
var environment = "@ViewBag.Environment";
var embedType = "@ViewBag.EmbedType";
var authorizationServerUrl = "@Url.Action("AuthorizationServer", "EmbedData")";
</script>
</head>

<body onload="renderDashboard(dashboardId)">
<div id="viewer-section" style="width: 100%;">
<div id="dashboard"></div>
</div>
</body>
Step 6: Create the Authorization API
Create a Controllers folder and add a controller named EmbedDataController.cs.
This controller performs three important tasks:
- Reads the embed query string.
- Generates a secure signature using the Embed Secret.
- Requests an access token from the Bold BI server and returns it to the Blazor application.
Keeping token generation on the server ensures that the Embed Secret is never exposed to the browser.
[HttpPost("[action]")]
[Route("AuthorizationServer")]
public string AuthorizationServer([FromBody] object embedQuerString)
{
var embedClass = JsonConvert.DeserializeObject<EmbedClass>(embedQuerString.ToString());
var embedQuery = embedClass.embedQuerString;
// Use your user email as embed_user_email
embedQuery += "&embed_user_email=" + GlobalAppSettings.EmbedDetails.UserEmail;
//To set embed_server_timestamp to overcome the EmbedCodeValidation failing while the client application is in different time zone.
double timeStamp = (int)DateTime.UtcNow.Subtract(new DateTime(1970, 1, 1)).TotalSeconds;
embedQuery += "&embed_server_timestamp=" + timeStamp;
var embedDetailsUrl = "/embed/authorize?" + embedQuery + "&embed_signature=" + GetSignatureUrl(embedQuery);

using (var client = new HttpClient())
{
client.BaseAddress = new Uri(embedClass.dashboardServerApiUrl);
client.DefaultRequestHeaders.Accept.Clear();

var result = client.GetAsync(embedClass.dashboardServerApiUrl + embedDetailsUrl).Result;
string resultContent = result.Content.ReadAsStringAsync().Result;
return resultContent;
}
}

public string GetSignatureUrl(string message)
{
var encoding = new System.Text.UTF8Encoding();
var keyBytes = encoding.GetBytes(GlobalAppSettings.EmbedDetails.EmbedSecret);
var messageBytes = encoding.GetBytes(message);
using (var hmac = new System.Security.Cryptography.HMACSHA256(keyBytes))
{
var hashMessage = hmacsha1.ComputeHash(messageBytes);
return Convert.ToBase64String(hashMessage);
}
}
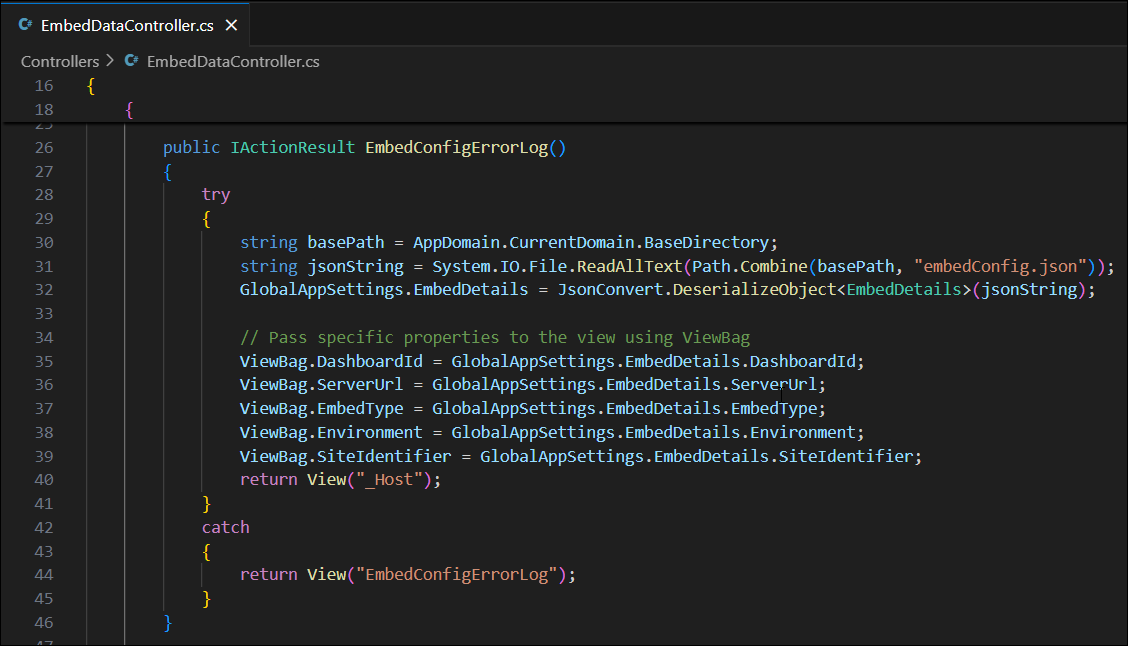
Step 7: Configure Program.cs
Before calling app.Run(), add the controller route configuration:
- Register the EmbedDataController
- Configure the default routing pattern
- Load and deserialize the
embedConfig.jsonfile
The configuration values are stored in GlobalAppSettings and used throughout the embedding process.
app.MapControllerRoute(
name: "default",
pattern: "{controller=EmbedData}/{action=EmbedConfigErrorLog}/{id?}");
string basePath = AppDomain.CurrentDomain.BaseDirectory;
string jsonString = System.IO.File.ReadAllText(Path.Combine(basePath, "embedConfig.json"));
GlobalAppSettings.EmbedDetails = JsonConvert.DeserializeObject<EmbedDetails>(jsonString);
Step 8: Run the Application
Once the configuration is complete, run the application using:
dotnet watch run
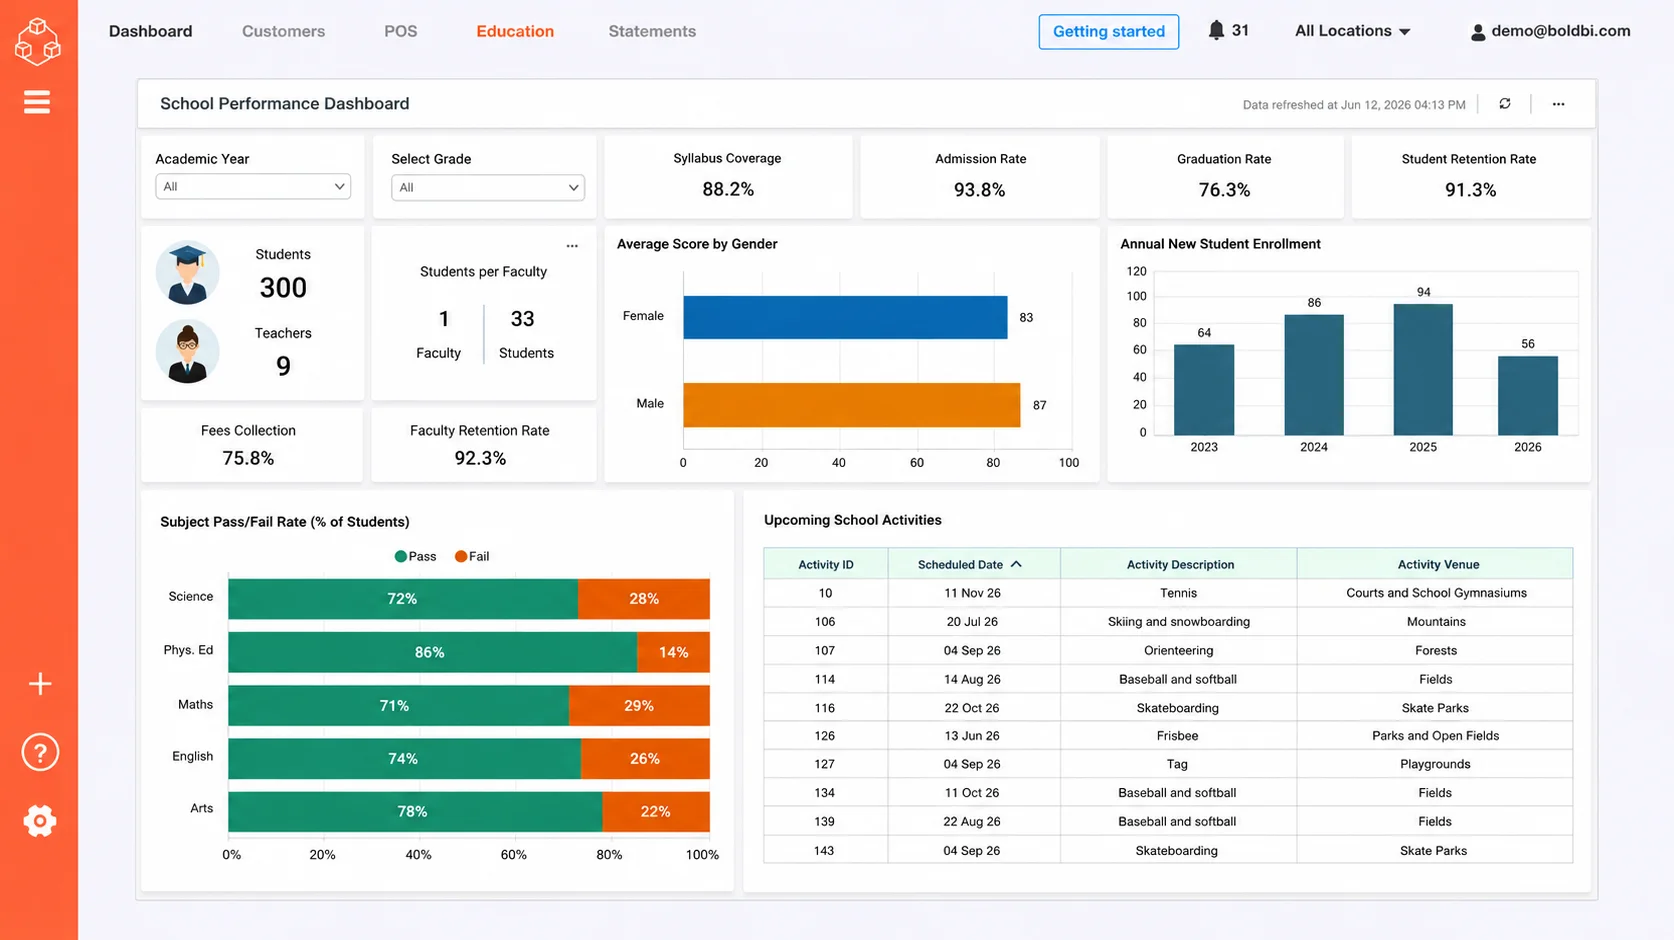
Step 9: Verify the Dashboard
After running the application, the dashboard is rendered securely inside the Blazor Server application.
To learn more about implementation details and explore sample projects, refer to the official Bold BI guide for ”How to Embed a Bold BI Dashboard in a Blazor Server Application”.
How Dashboard Embedding Works in a Blazor Server Application
The Blazor Server sample follows a sequence of configuration loading, secure token generation, token handling, and dashboard rendering.
How It Works
- Blazor application requests a secure embed token.
- Authorization API generates the request and signature.
- Bold BI server validates the embed secret and request.
- Bold BI server returns the embed token.
- Authorization API returns the token to the Blazor application.
- Blazor application uses the token with the Bold BI JavaScript SDK to render the dashboard.

To learn more, refer to the official Bold BI documentation on how the Blazor Server sample works.
Why Choose Bold BI for Dashboard Embedding?
Bold BI® is well suited for embedding analytics in Blazor applications, enabling secure and flexible integration into existing workflows. With token-based authentication, interactive dashboards, and scalable embedding options, it helps developers deliver seamless analytics experiences. With Bold BI, organizations can:
- Embed dashboards directly within application workflows
- Maintain secure access through token-based authentication
- Deliver interactive analytics experiences to users
- Support role-based access control and governance
- Accelerate analytics delivery without building analytics infrastructure from scratch
- Scale analytics across users, teams, and applications
- Support multi-tenant analytics for SaaS applications
Whether you are building SaaS platforms, internal applications, or customer-facing portals, Bold BI provides a reliable way to integrate analytics into your application.
Ready to get started? Try embedding a dashboard in your Blazor Server application and see how Bold BI can bring interactive data insights directly into your workflows. For deeper guidance, start a free trial, explore the documentation, or request a demo to see how it fits your use case.
Frequently Asked Questions
- 1.
Can I embed multiple dashboards in a Blazor Server application?
Yes. You can embed multiple Bold BI dashboards in the same Blazor Server application by configuring separate dashboard instances.
- 2.
How can I secure embedded dashboards for different users?
Use authentication and role-based access control to ensure users only access the dashboards and data they are authorized to view.
- 3.
Is authentication required for embedding?
Yes. Authentication is recommended to protect embedded dashboards from unauthorized access.
- 4.
Can I customize dashboard appearance?
Yes. You can customize themes, colors, layouts, and other UI elements to match your application’s branding.
- 5.
Does embedding dashboards affect application performance?
Performance depends on dashboard complexity, data volume, and network conditions. With proper configuration, embedded dashboards can run efficiently in Blazor applications.
- 6.
What are the prerequisites for embedding a Bold BI dashboard in Blazor?
You need a Bold BI environment, a published dashboard, embedding enabled, required configuration values, and a Blazor application set up for integration.
- 7.
How do I embed analytics in a Blazor Server application?
Enable dashboard embedding, configure authentication, add the required settings, and render the dashboard using JavaScript interop.