Enhancing Real-Time Data Delivery and Alerts with Webhooks

Webhooks have transformed the way businesses integrate and synchronize data, making custom integrations simpler and less time-consuming. This feature, offered by Bold BI®, allows for seamless application integration and automation of workflows. This blog delves into the significance of webhooks and how to set them up for scheduling purposes.
What is a webhook in Bold BI?
Webhooks are essentially user-defined callback URLs that web applications use to inform other applications about specific changes or events, such as a new user registration, a product purchase, or a file update.
Benefits of webhooks in Bold BI
The application of webhooks in Bold BI brings a myriad of advantages for organizations and developers:
- Workload reduction: The webhook feature in Bold BI eradicates the need for manual data entry and verification, thus substantially reducing the data management workload.
- Scalability improvement: The ability of webhooks to handle large data volumes and accommodate multiple users simultaneously enhances Bold BI’s scalability.
- Real-time data access: Webhooks facilitate immediate access to data updates, thereby eliminating the need to request information manually or wait for updates.
- Integration with other tools: Bold BI’s webhooks can be integrated with tools like Microsoft Power Automate for real-time data transfer and event triggering.
- Improved data security: Webhooks use encryption and robust security measures to protect sensitive data during transfer.
- Automated processes: Webhooks automate the data export process, saving time and minimizing human error.
Now, let’s see how it works.
Understanding how webhooks work
Webhooks play an essential role in establishing real-time communication among software systems. They work through the following means:
- Establishing a threshold: The process commences with a user setting a threshold value for a BI dashboard widget. This value acts as a system trigger.
- BI tool monitoring: The BI tool persistently tracks the widget’s value in real-time, vigilantly observing any data alterations.
- Breaching the threshold: When the widget’s value surpasses the preset threshold value, signifying a considerable event or condition shift, the BI tool is set to act.
- Webhook event initiation: Rather than just alerting the user, the BI tool produces a webhook event, which carries details about the specific change or event that transpired within the widget.
- Arrival at the webhook endpoint: The created webhook event is sent to a predetermined webhook endpoint. Typically, this endpoint is an HTTP URL managed by another app or service, ready to receive and process incoming webhook events.
- Handling at the webhook endpoint: Upon receiving the webhook event, the webhook endpoint reacts based on the included event information. For example, it might export the BI dashboard widget’s current status to a document, refresh a database, relay the data to an external system, or possibly initiate another event.
Webhooks, acting as real-time messengers, enable quick responses to critical events across a system such as Bold BI, facilitating timely decisions and actions. The following illustrates how this process could potentially be utilized in a finance department.
Use cases for webhooks with BI dashboard
By utilizing the webhook feature in dashboard scheduling, a finance department can generate instant updates on financial activities. This can be achieved by employing a BI tool for monitoring invoices and subscription management. The finance department can set threshold values for their monthly subscriptions and invoices widgets, as shown in the following Stax Bill Subscription Management Dashboard.
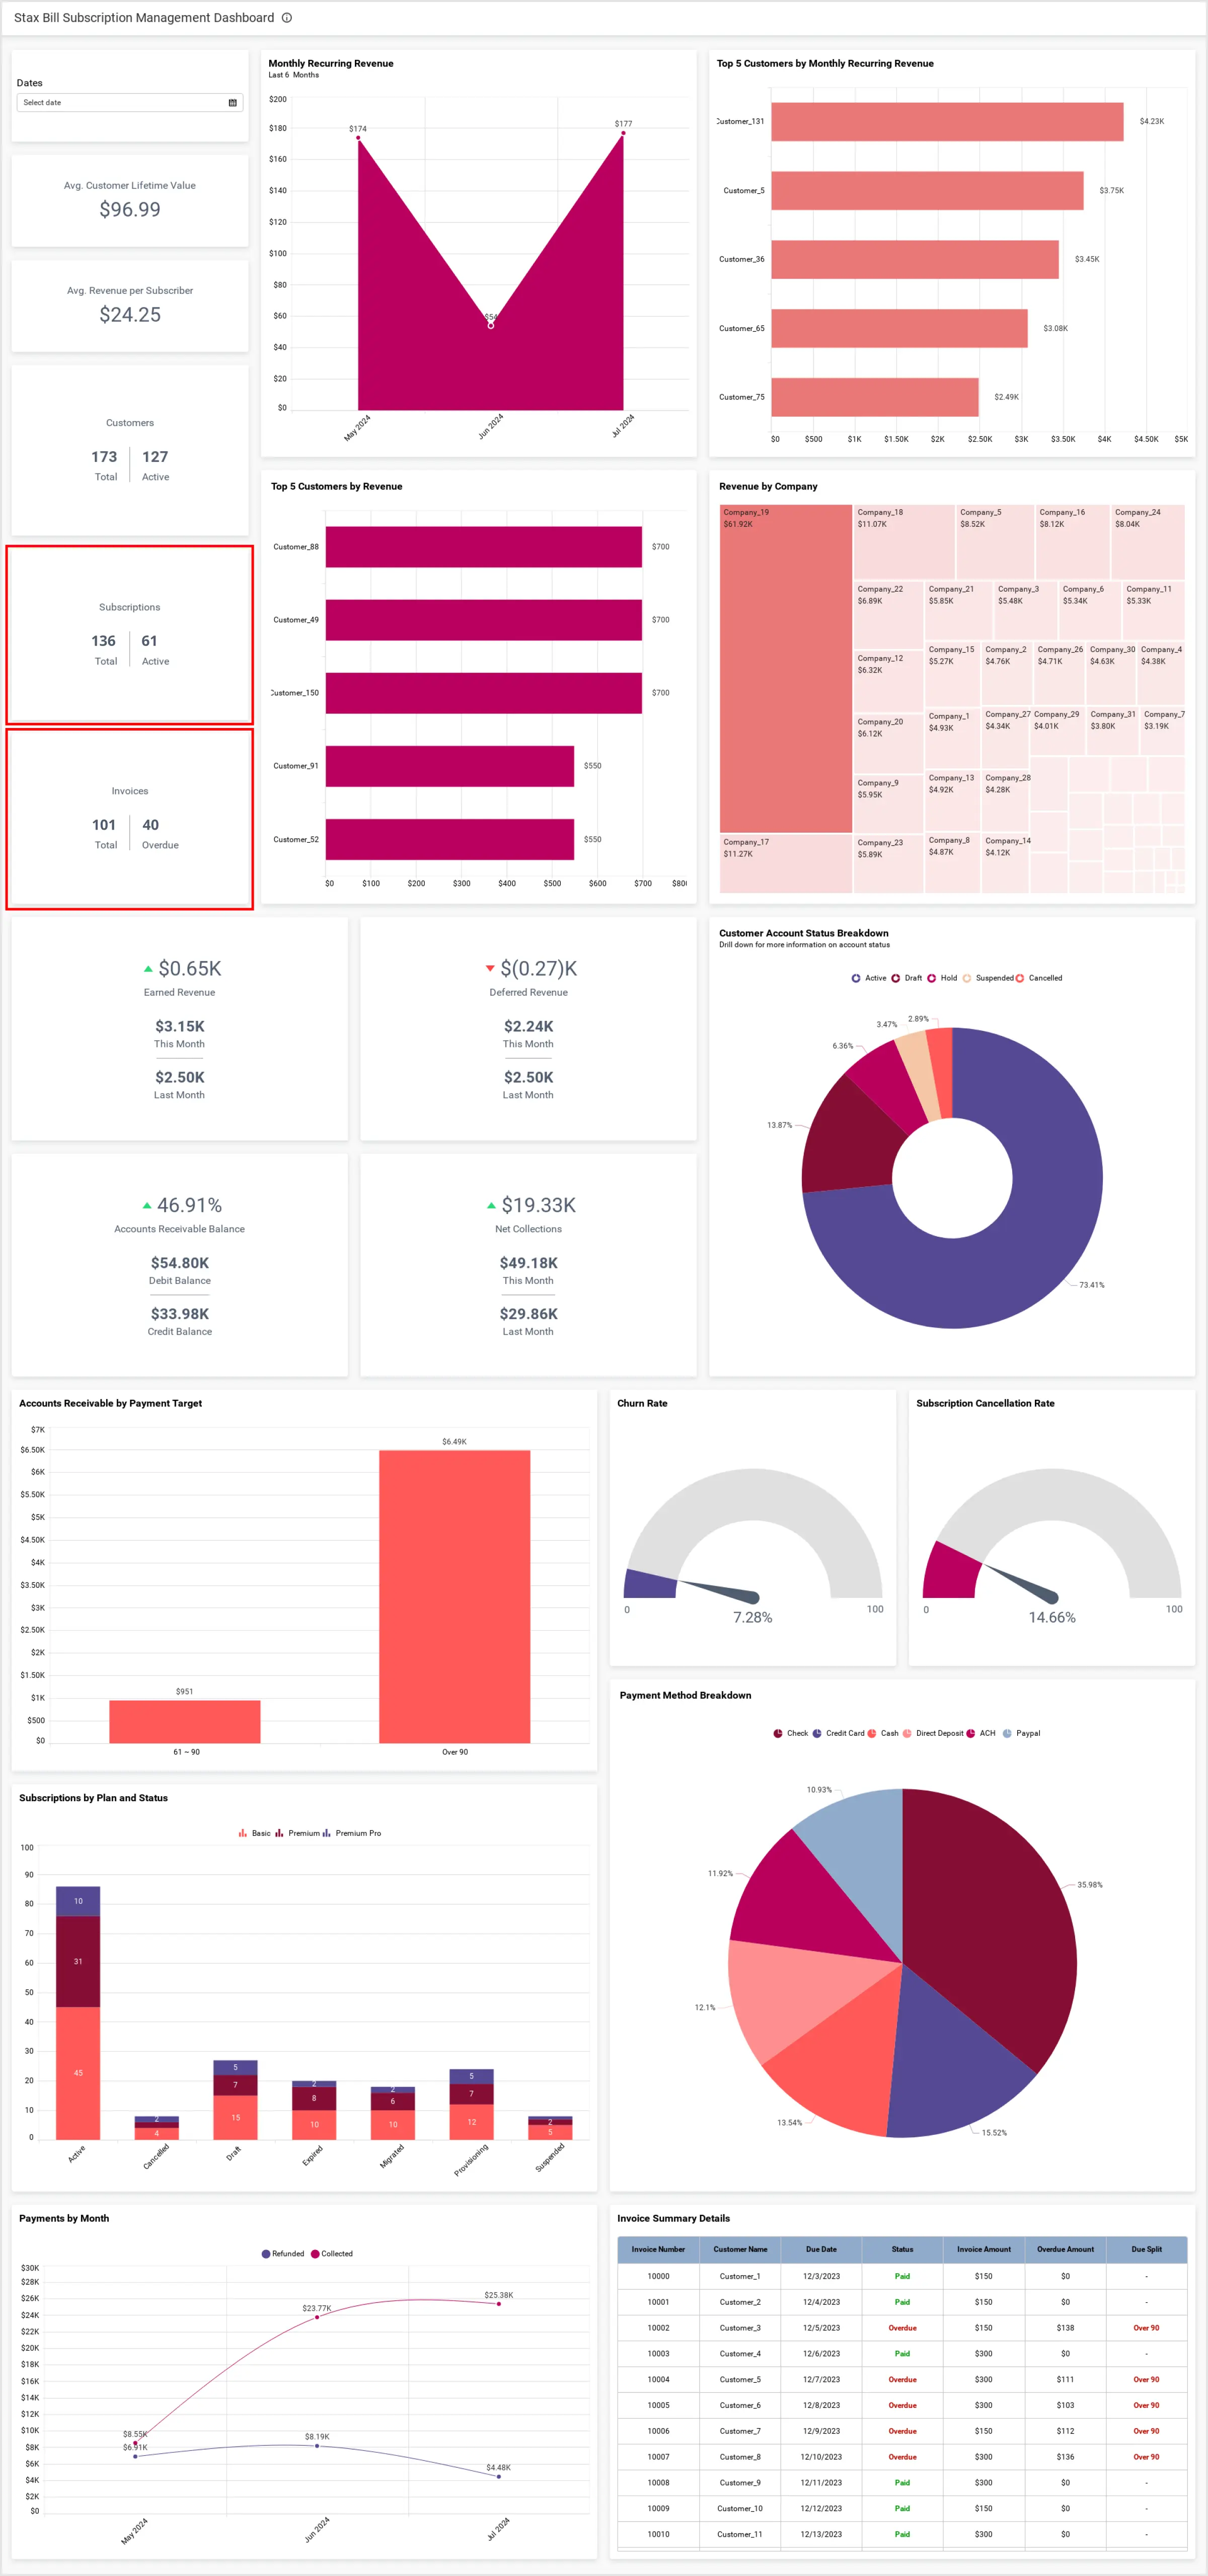
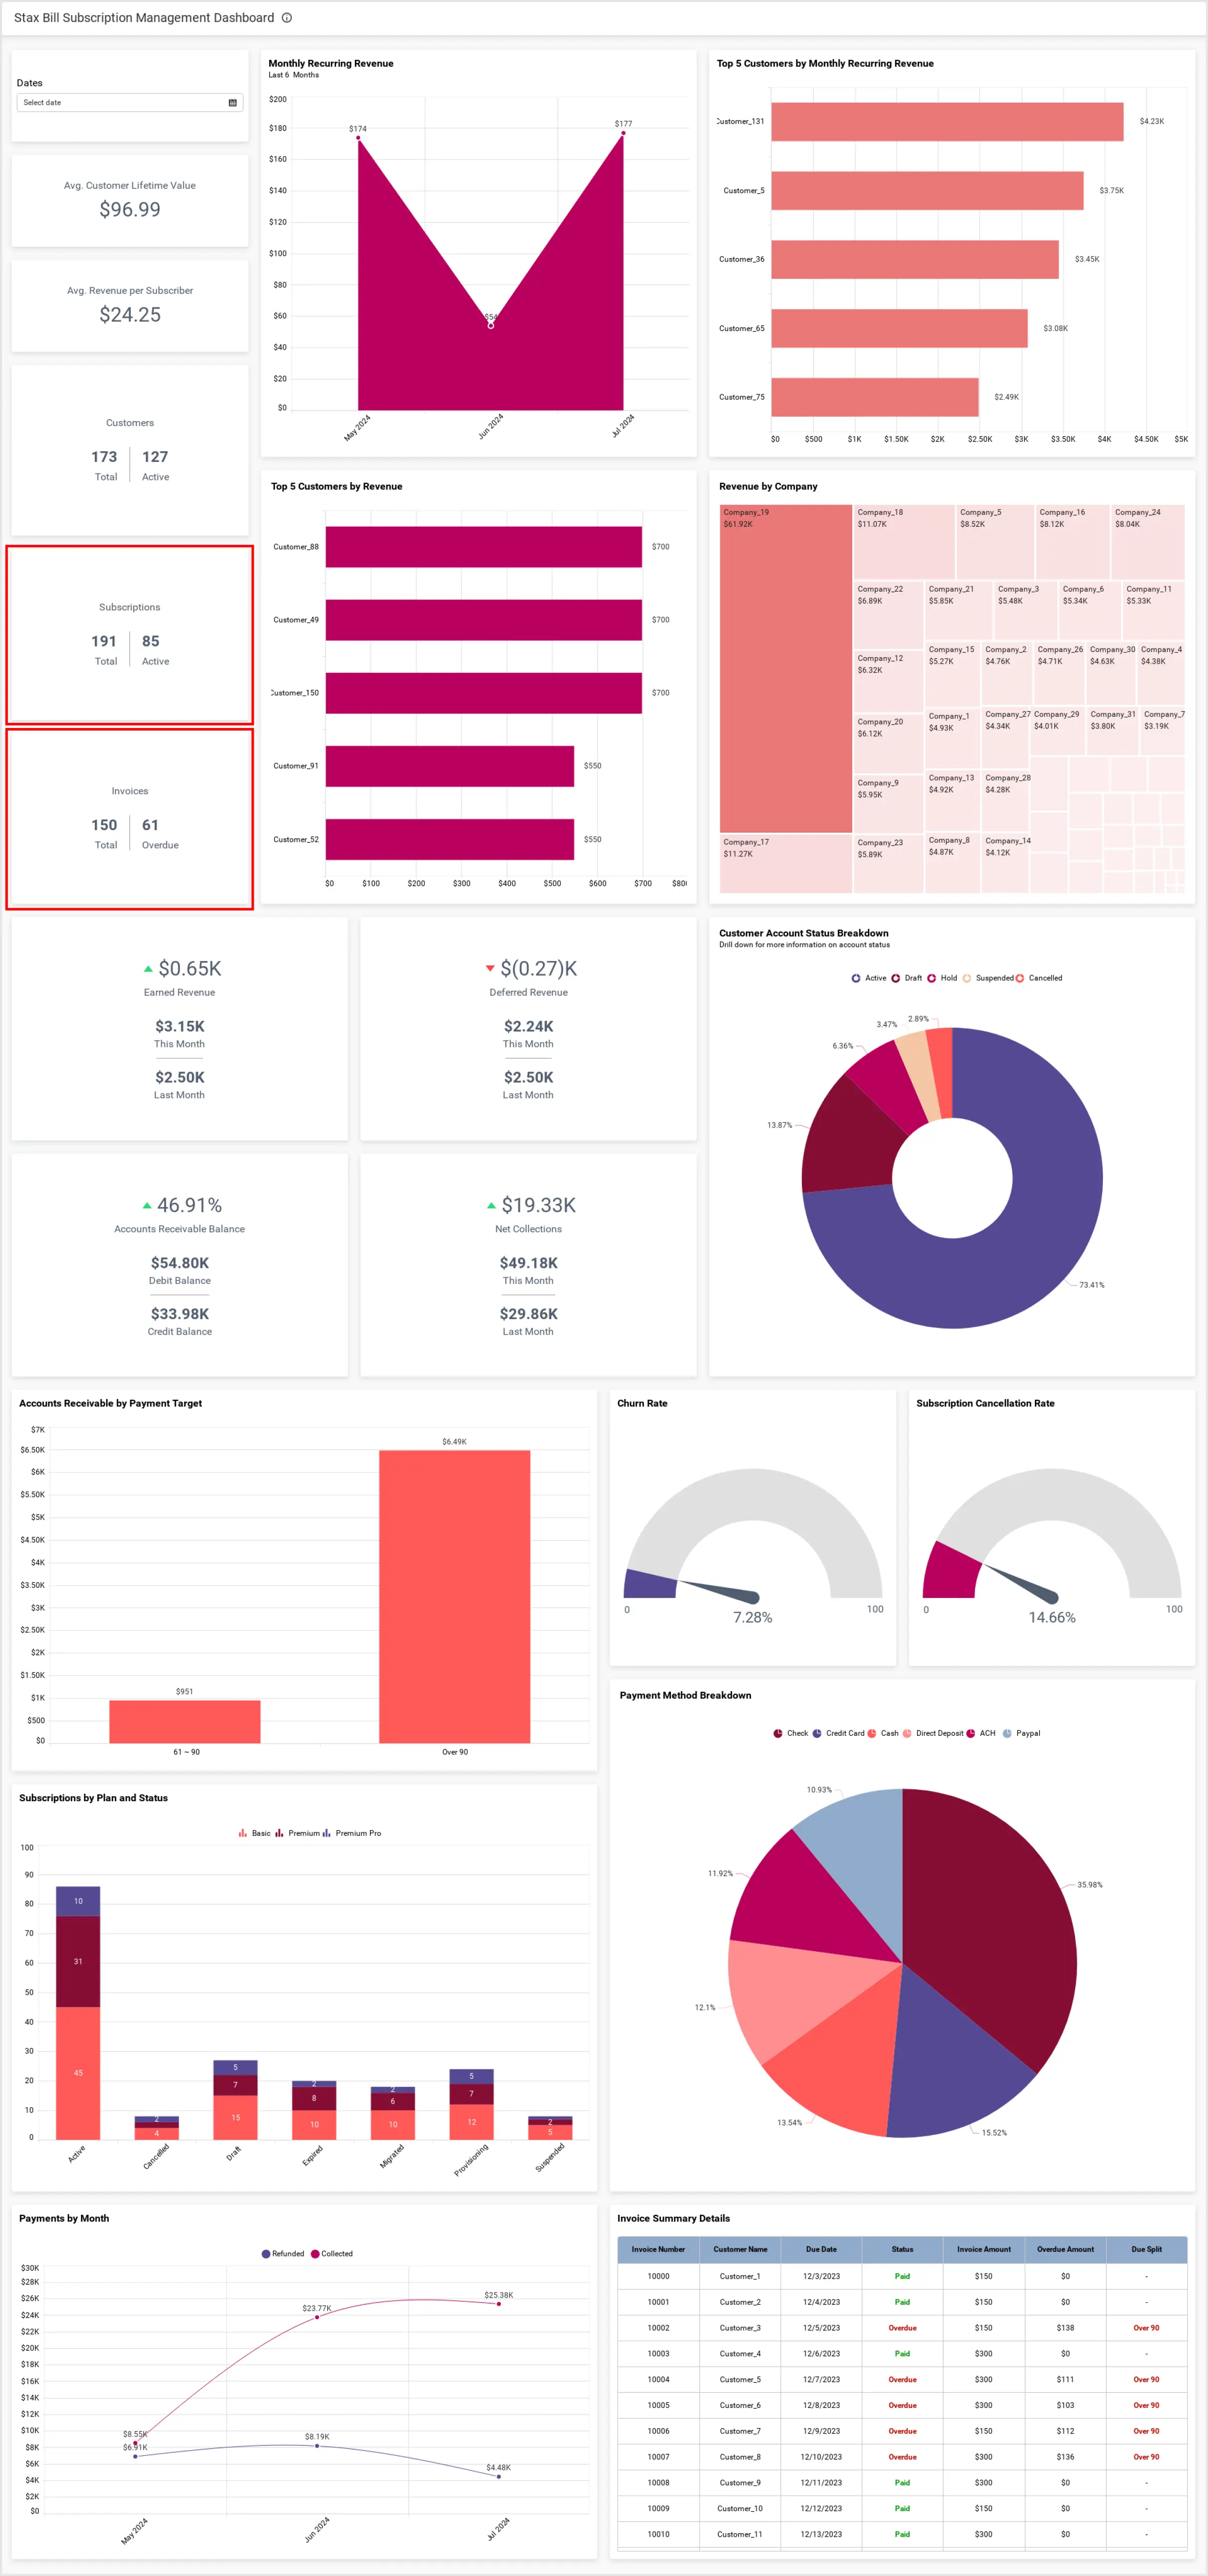
Previously, the value of the subscription and invoices are 136 and 101 respectively. If the value of the monthly subscriptions and invoices surpasses the widget’s threshold value, the BI tool triggers a webhook event, which is then sent to a webhook endpoint.
The following screenshot shows the increase in subscription and invoice value of the widgets.
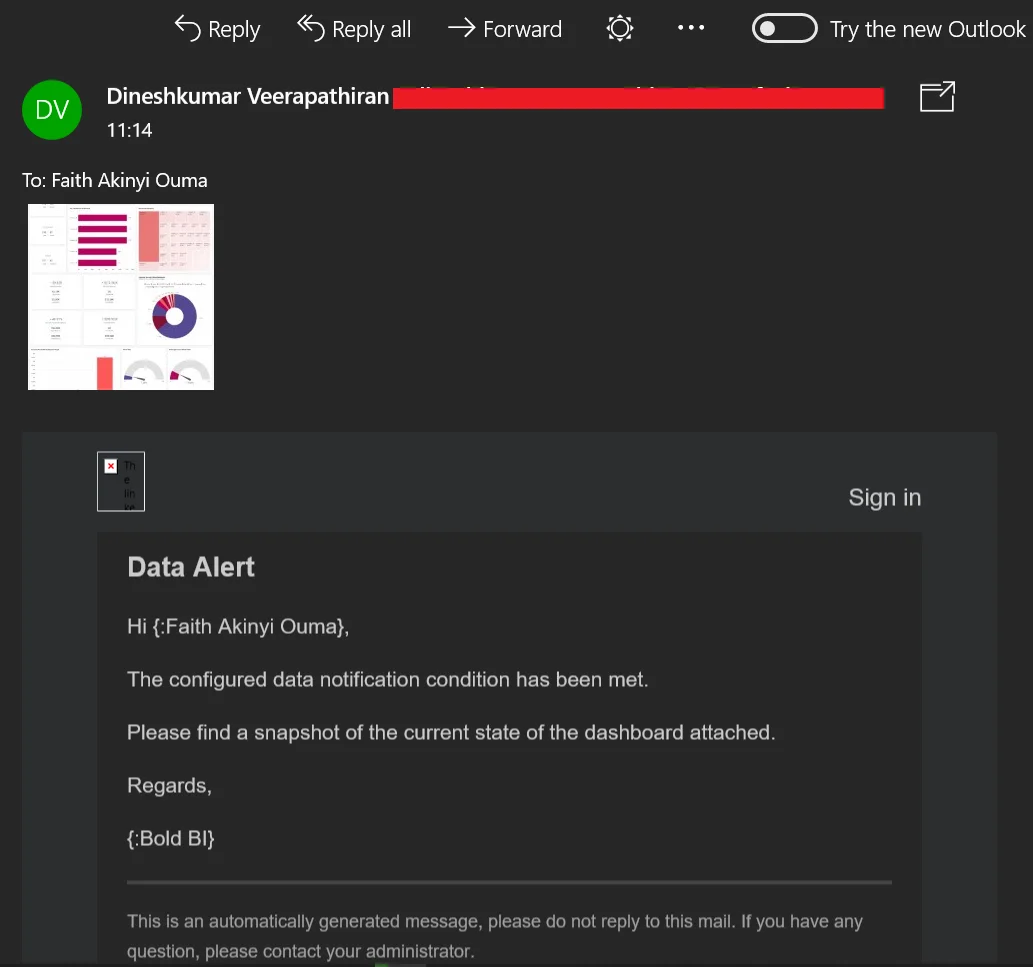
The webhook endpoint receives the webhook event and exports the current statuses of the monthly subscriptions and invoices widgets to a file. This file is subsequently forwarded to the financial analysts for examination, allowing them to take necessary action.
In general, this process can be used to trigger a variety of actions for a finance department, such as:
- Updating financial records: The webhook sends a notification to the finance system when a new invoice is slated, or a subscription is adjusted. This triggers an automatic update of financial records with the latest data, thereby reducing the chance of human errors. Therefore, the finance department retains precise, real-time information on every company transaction.
- Automated payment processing: The system automatically processes payments for new invoices using saved customer payment details. This eliminates manual processing by the finance department, saving time and resources. If a payment issue arises, the system notifies the concerned team members. This enables an effective payment process and promotes steady cash flow.
Certainly, using webhook notifications is convenient for a finance department, reducing manual tasks and mitigating errors. Obviously, this is just one-use case, as webhooks are used across industries.
How to configure webhooks in Bold BI
Bold BI’s webhook option enables the automated sending of dashboard reports according to set schedules. It allows integration with other applications for real-time updates on increases, decreases, or changes in threshold values. To configure webhooks in Bold BI, you must have management software that supports webhooks. If no dashboard has been created in your application, refer to this help documentation for guidance. To configure webhooks in Bold BI, follow these steps.
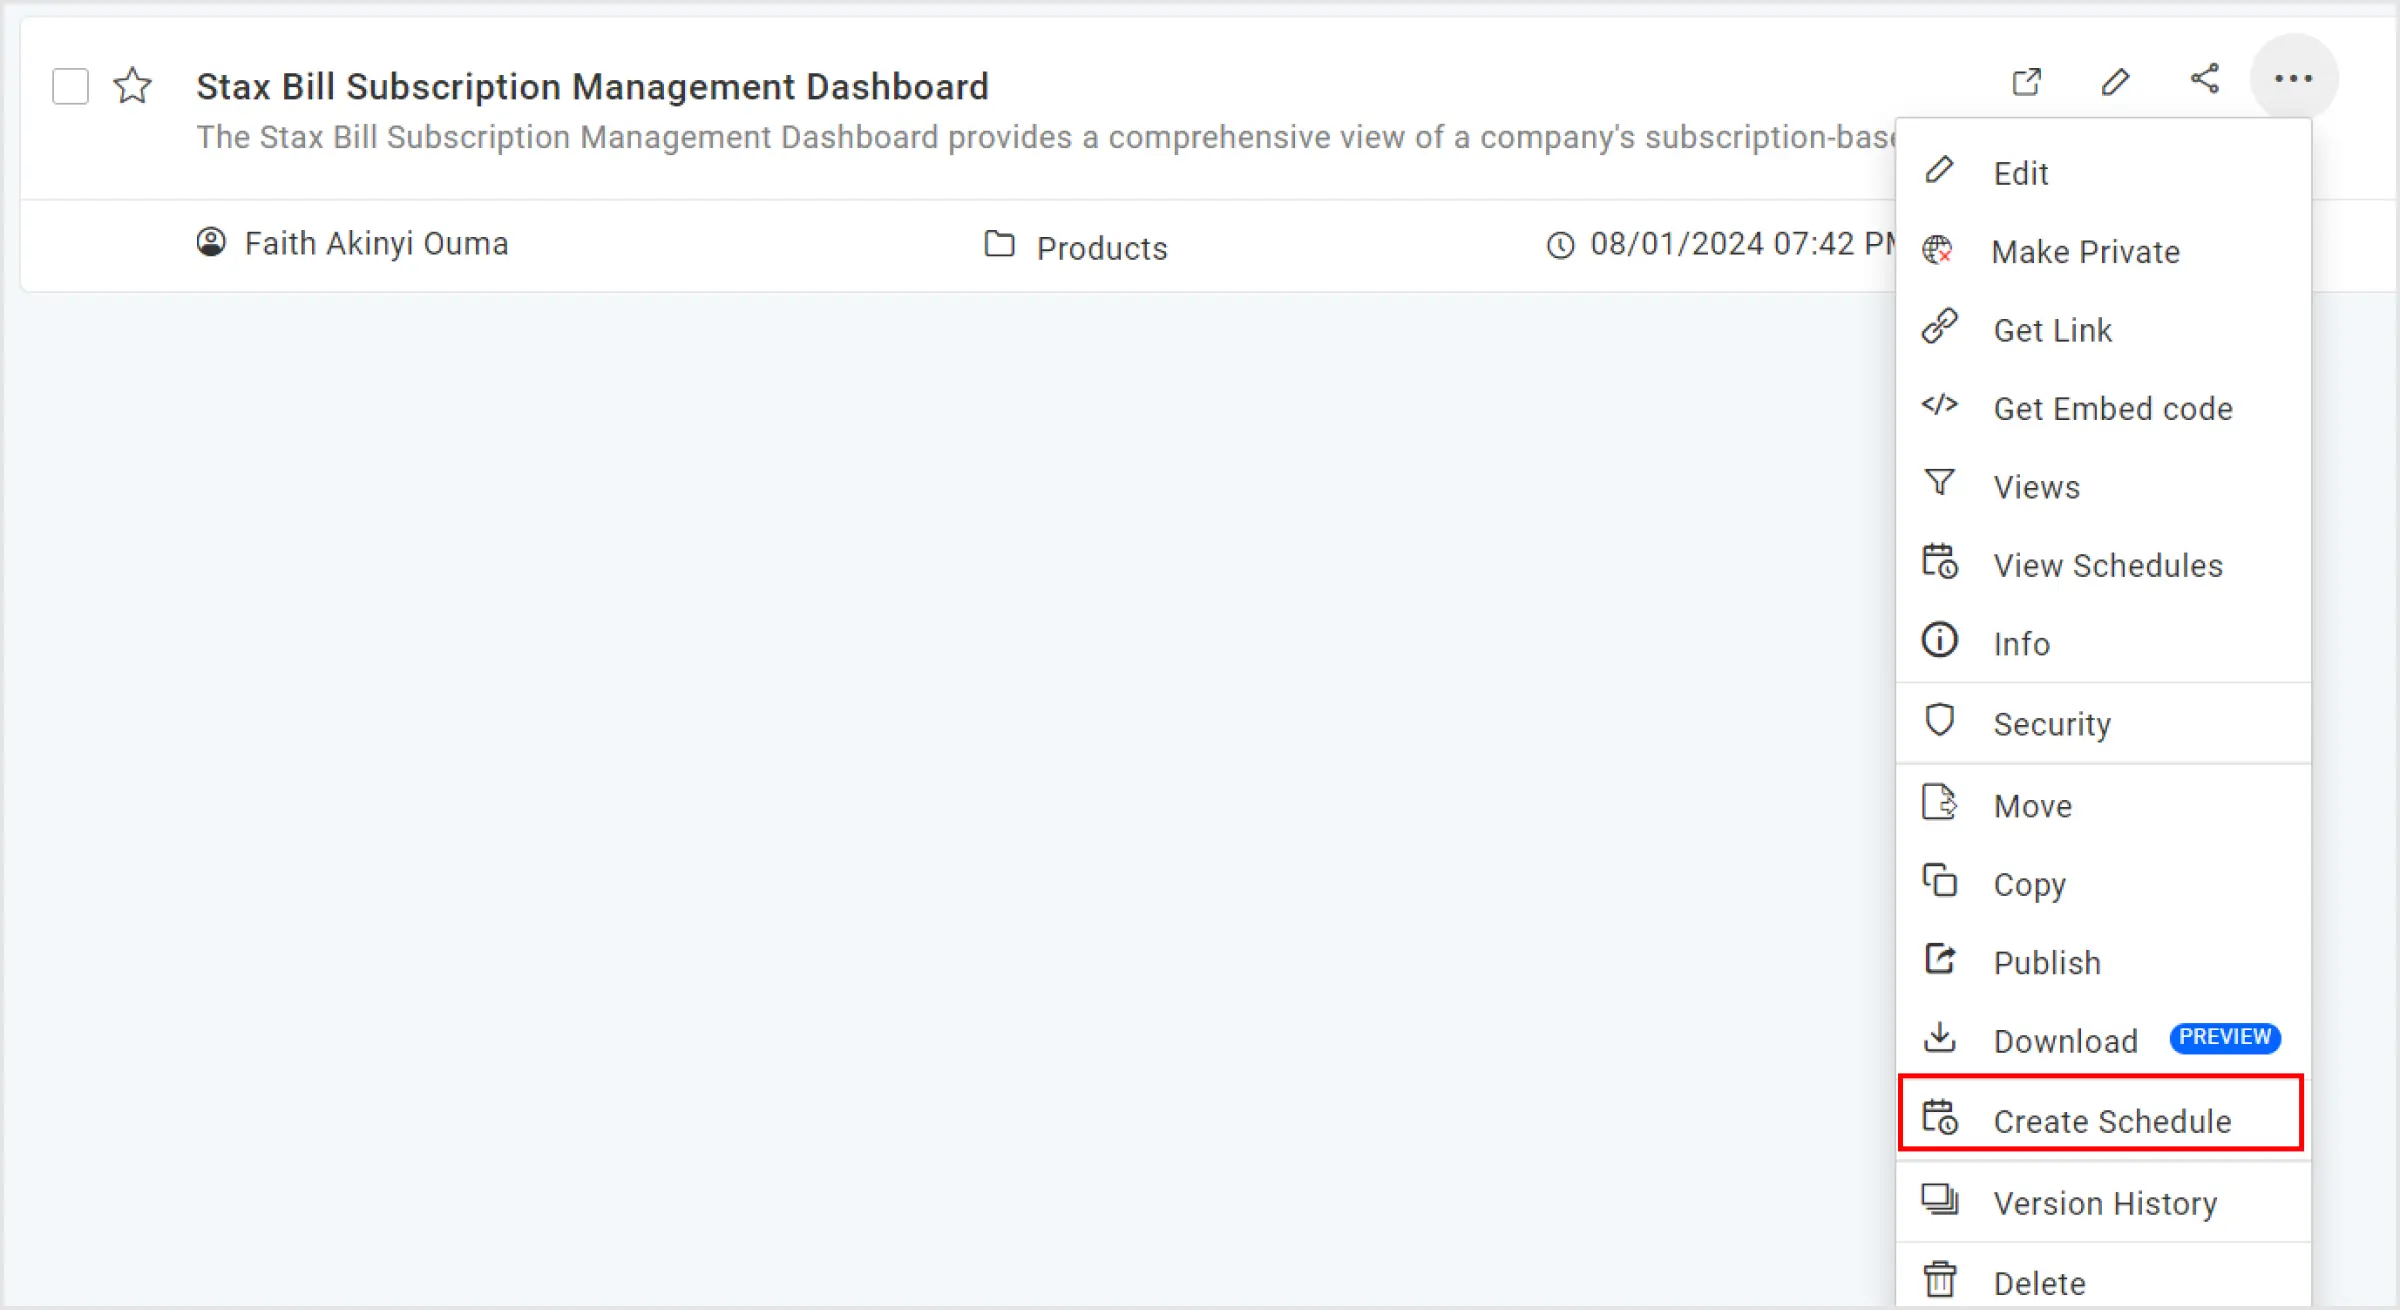
Step 1: First, we need to create a schedule to configure the webhook notification. In the dashboard grid, open the actions menu (three vertical dots) near the appropriate dashboard and select Create Schedule.
Step 2: The schedule configuration panel will open. Here, you can configure the schedule name, time zone, start time, and recurrence options, as shown.

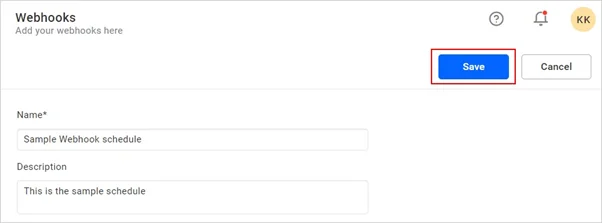
Step 3: After providing the webhook details, click Save to add the webhook to Bold BI.
Step 4: You will be taken to the webhook configuration window, where you select the alert recipients and dashboard export format. You can send it to other destinations through the webhook configuration dialog, as shown in the following.

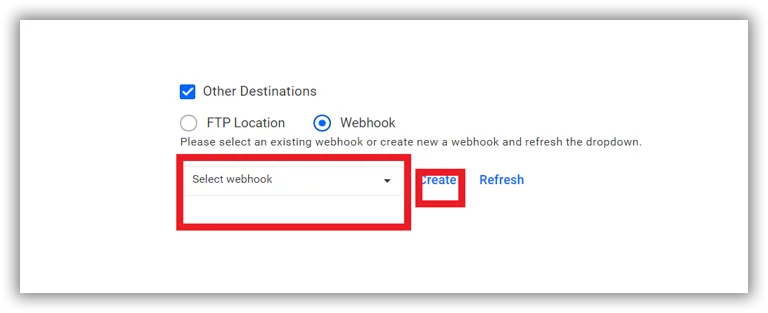
Step 5: Here, we need to add a webhook to schedule the data alert notification. You can add an existing webhook to your application using the dropdown, but if you don’t have one, select Create.
How to add webhook in Bold BI
To add a webhook in Bold BI:
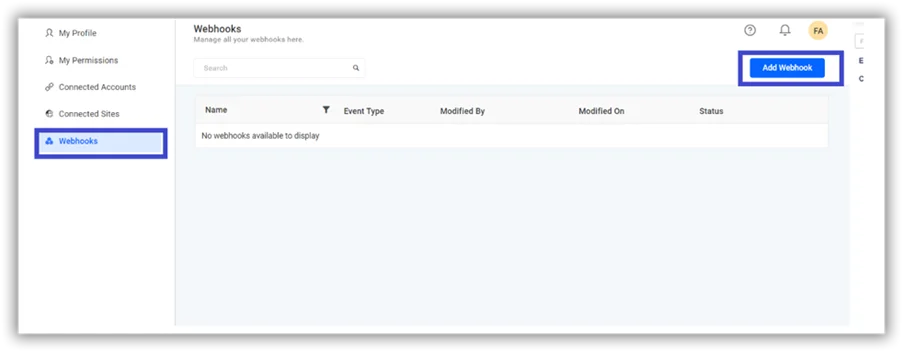
a. Click Add at the top right of the Webhook section of the profile page. This will open the Add Webhook configuration window.
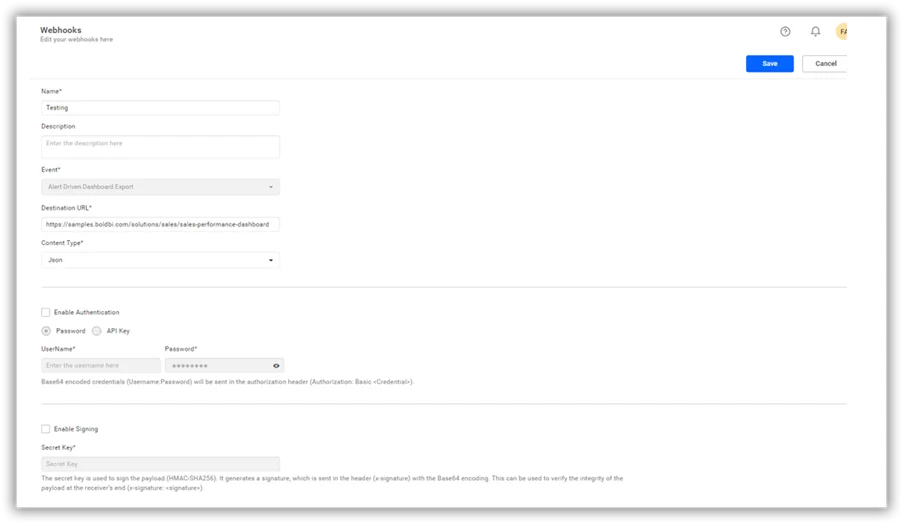
b. Provide the webhook URL to which you want to send the dashboard report. This URL should be the endpoint that will receive and process the data in your external application.
Example URL: https://webhook.site/0fedc390-a3e8-4b9d-9f0f-594fc4bf9a98
c. Set authentication (optional) by selecting the Authentication checkbox, if your webhook requires authentication, and then provide the necessary credentials.
d. In the Payload section, you can customize the data that will be sent to the webhook by choosing from various formats like JSON, XML, or form data. You can also add custom headers, if required.
e. In the Export Settings section, you can choose the format in which you want to send the dashboard report, like PDF, Excel, or image. You can also set the size of the exported file.
f. Click Save once you have configured the webhook to add it to the schedule.
Please check out this documentation to see how to add webhooks in Bold BI.
Step 6: After adding the webhook, click Schedule in the Schedule window to create the schedule. Now that the webhook notification has been added successfully, your dashboard or report will be sent to the specified webhook at the scheduled time. The external application should be set up to receive the data and process it according to your requirements.
The details of the dashboard files will be sent to the designated site you configured in the webhook. Please refer to the following image.
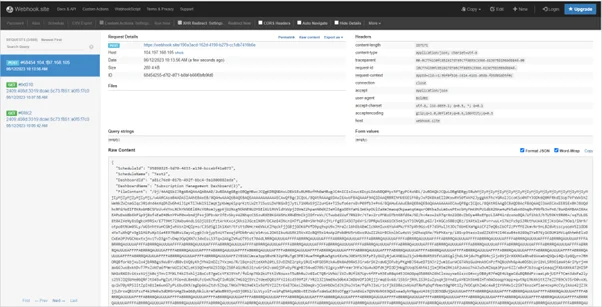
Note: In the case of a failure, the details will be sent only to the specified email address and will not be sent to the webhook-designated site.
Conclusion
Webhook notifications automate processes by triggering actions based on received information, enabling customers to handle them programmatically and reduce reliance on manual checks and work.
You can also check our blog, Stay Informed with Data Alert Notifications, to learn more about data alert scheduling.
I hope this blog has given you a satisfactory overview of how you can manage webhooks in Bold BI® and the benefits of using them. If you have any questions about this blog, feel free to post them in the following comment section. If you are new to Bold BI, we invite you to sign up for a free trial on our website.