Empower Applications with Embedded Widget Capabilities
Staying ahead of the curve is critical in the ever-evolving application development landscape. Widgets have become potent visuals for designing immersive and interactive experiences, attracting users in unprecedented ways. This blog post is an exhaustive guide how to embed a widget into your application. Prepare to embark on a revolutionary journey that will differentiate your application from the rest.
Benefits of embedding a widget in your application
Harnessing a widget’s potential in embed mode offers several benefits:
- Time and cost efficiency: Embedding a widget saves development time and reduces costs by leveraging prebuilt functionalities.
- Easy updates and maintenance: Embedded widgets receive automatic updates and maintenance from developers, keeping your application up to date without manual intervention.
- Competitive edge: Embedding widgets gives your application a competitive edge with unique features and functionalities.
- Increased user engagement: Embedded widgets capture users’ attention, promoting exploration and interaction and increasing engagement and satisfaction.
- Improved data visualization: Widgets improve data visualization, presenting complex information in visually engaging formats.
- Cross-platform compatibility: Widgets are cross-platform compatible, providing a consistent experience across different devices and platforms.
How to embed a widget from a dashboard
Using the Bold BI® wrapper on your HTML page, you can embed a dashboard widget in your application. Use the following steps to embed a dashboard widget in your application using the JavaScript API method.
- Insert the following Embed SDK URL into the head tag of your .html page.
<head>
    <script type="text/javascript" src="https://cdn.boldbi.com/embedded-sdk/v6.9.10/boldbi-embed.js"></script>
</head>

Embed SDK URL - Within the body tag, you must generate a div element using a unique id name you’ve created. This element will serve as the embedding point for the dashboard widget.
<body>
    <div id="dashboard_container"></div>
</body>
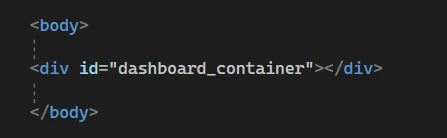
Generating a div Element - You need to incorporate the function for creating a Bold BI instance with specified properties within the body tag. Use the onload attribute to initiate this function within the body. Additionally, invoke the loadDashboardWidget(“{widget_name/widget_id}”) function, inputting the widget details.
- To embed the widget, retrieve the widget id from the URL. You can embed the widget by using either the id number associated with it or the specific name assigned to it. Both can be obtained as demonstrated in the following sample.
[HttpGet]
[Route("GetDashboardWidgets")]
public string GetDashboardWidgets()
{
var token = GetToken();
using (var client = new HttpClient())
{
client.BaseAddress = new Uri(EmbedProperties.RootUrl);
client.DefaultRequestHeaders.Accept.Clear();
client.DefaultRequestHeaders.Add("Authorization", token.TokenType + " " + token.AccessToken);
var result = client.GetAsync("https://localhost:51777/bi/api/site/site1/v4.0/dashboards/b646b8a1-a4c6-4dee-9877-f9559c82f7fa/widgets").Result;
string resultContent = result.Content.ReadAsStringAsync().Result;
return resultContent;
}
}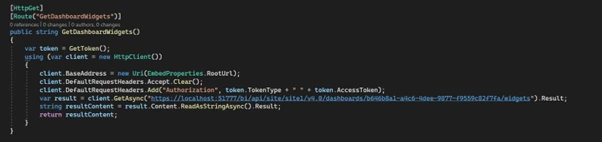
Getting Widget ID - Proceed to embed the widget with either ID or name as shown.
- Widget name
function embedSample() {
    var boldbiEmbedInstance = BoldBI.create({
        serverUrl: "http://localhost:51777/bi/site/site1",
        dashboardId: "9a4b8ddb-606f-4acd-8c53-8ccdcaa92a87",
        embedContainerId: "dashboard-container",// This should be the container id where you want to embed the dashboard designer
        embedType: BoldBI.EmbedType.Component,
        mode: BoldBI.Mode.View,
        height: "800px",
        width: "1200px",
        authorizationServer: {
            url: "http://example.com/embeddetail/get"
        },
        expirationTime: "100000",
    });

    boldbiEmbedInstance.loadDashboardWidget("Sales By Country"); // Pass widget name as argument to loadDashboardWidget function
}
Embedding with Widget Name - Widget ID
function embedSample() {
    var boldbiEmbedInstance = BoldBI.create({
        serverUrl: "http://localhost:51777/bi/site/site1",
        dashboardId: "9a4b8ddb-606f-4acd-8c53-8ccdcaa92a87",
        embedContainerId: "dashboard-container",// This should be the container id where you want to embed the dashboard designer
        embedType: BoldBI.EmbedType.Component,
        mode: BoldBI.Mode.View,
        height: "800px",
        width: "1200px",
        authorizationServer: {
            url: "http://example.com/embeddetail/get"
        },
        expirationTime: "100000",
    });
    boldbiEmbedInstance.loadDashboardWidget("efbf2999-f7e7-4831-a492-53c4df394af0"); // To get widget id, please refer `How to get Widget ID`
}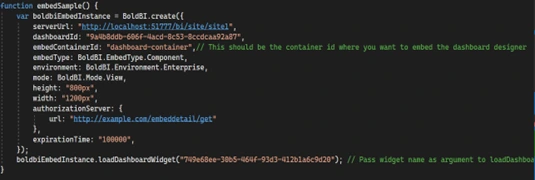
Embedding with Widget ID
- Widget name
- Now execute the sample to embed the dashboard widget. The embedded widget will be displayed as illustrated.
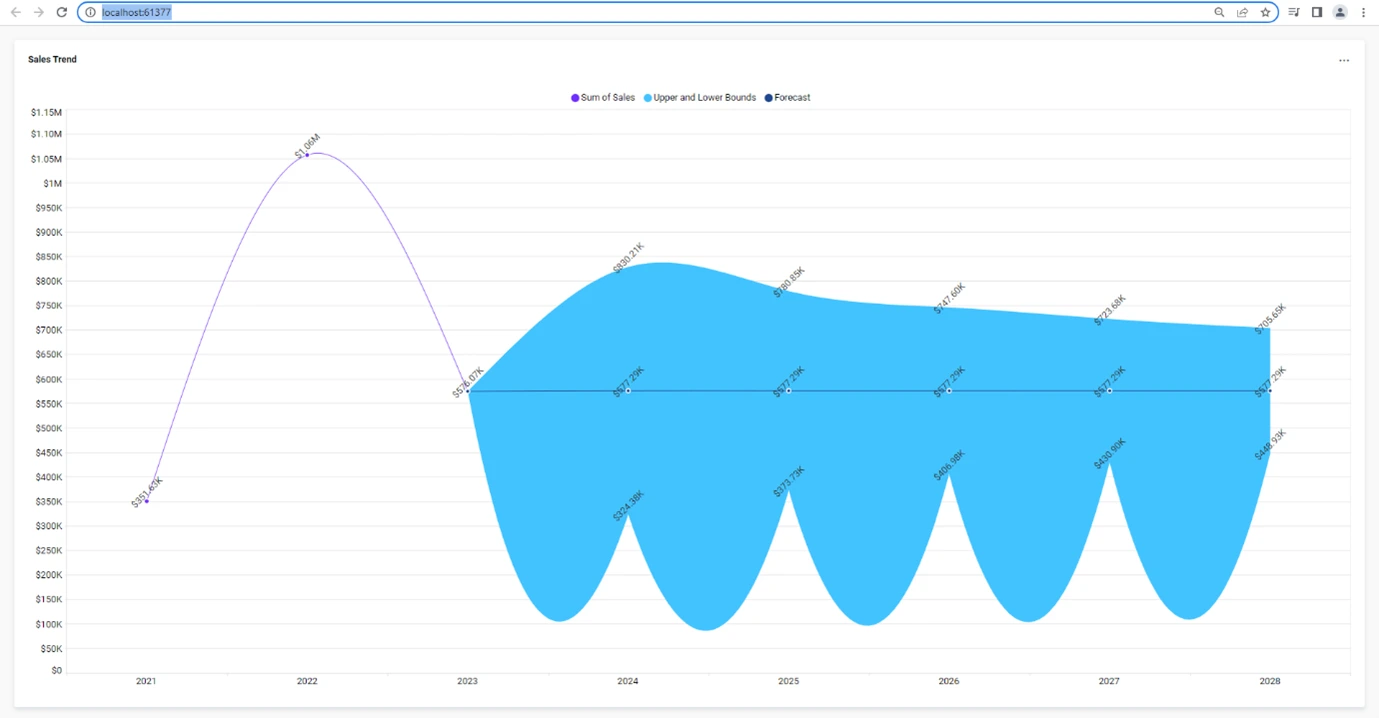
Embedded Widget
Filtering an embedded widget in an application
Embedded widgets can be edited by actions such as sorting, filtering, formatting data values, applying drill-down features, linking, and changing the overall widget appearance. In the following instance, we have edited the widget by applying a filter to showcase specific data in the widget. Follow these steps to edit an embedded widget:
- In the embedded application, find the BoldBI.create() method and substitute the loadDashboard() method with loadDashboardWidget(). To embed a particular widget, give the widget’s name or ID. Also, enter the corresponding dashboard ID in the dashboardId property.
- Use the “filterParameters” API member to provide the filter parameter and its value.
function renderDashboard() {
    var dashboard = BoldBI.create({
        serverUrl: rootUrl + "/" + siteIdentifier,
        dashboardId: "786c7e2a-854e-4bd2-8313-619e3daa9855",
        embedContainerId: "dashboard",
        embedType: BoldBI.EmbedType.Component,
        environment: environment == "enterprise" ? BoldBI.Environment.Enterprise : BoldBI.Environment.Cloud,
        width: "100%",
        height: "100%",
        mode: BoldBI.Mode.View,
        expirationTime: 172800,
        authorizationServer: {
            url: authorizationServerUrl
        },
        filterParameters: "Year(orderDate)=2023"
    })
    dashboard.LoadDashboard();
}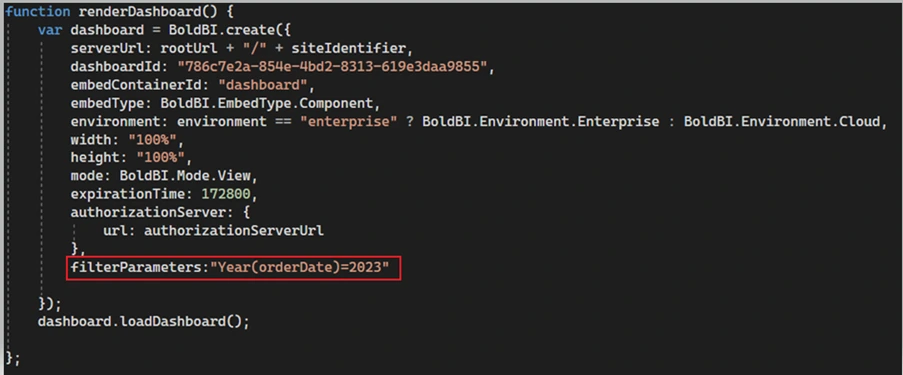
Load Filter Parameter - The embedded widget will be updated and showcased based on the value of the filter.
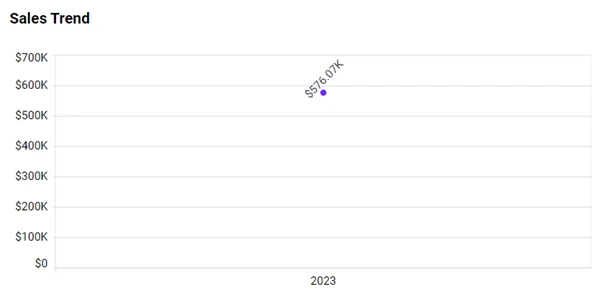
Filtered Embedded Widget
How to embed a widget using iFrame
Using an iFrame-based single sign-on (SSO) with token-based authentication, you can embed widgets in Bold BI.
To embed a widget from the dashboard into any application, you’ll need its URL. The process requires activating widget mode and incorporating the widget ID into the embed URL. Here are the steps to embed a widget.
- Locate the ID of the widget you want to embed.
- Obtain the URL of the dashboard.
- Use both the widget ID and the dashboard URL to embed the widget.
Getting the embed widget URL
To get the embed URL follow these steps.
- Enter the desired dashboard and select the widget you wish to integrate by clicking on More Options.
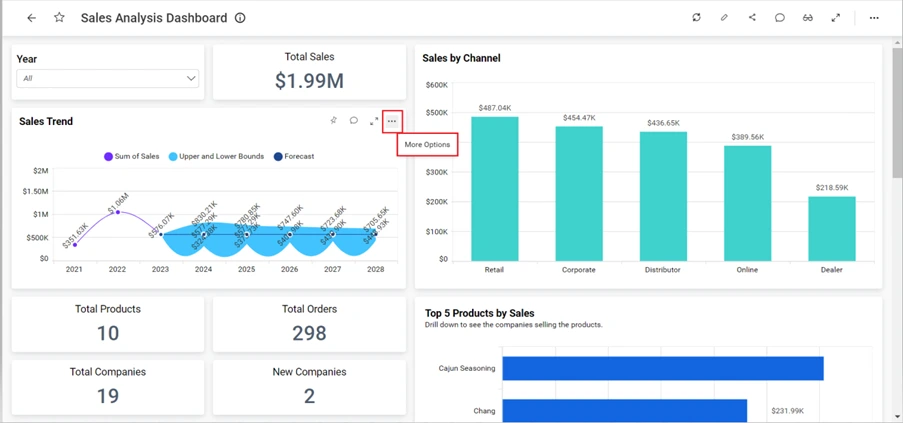
More Options - On the drop-down option, select Get Embed Code and copy the iframe code from the embed code pop-up page.
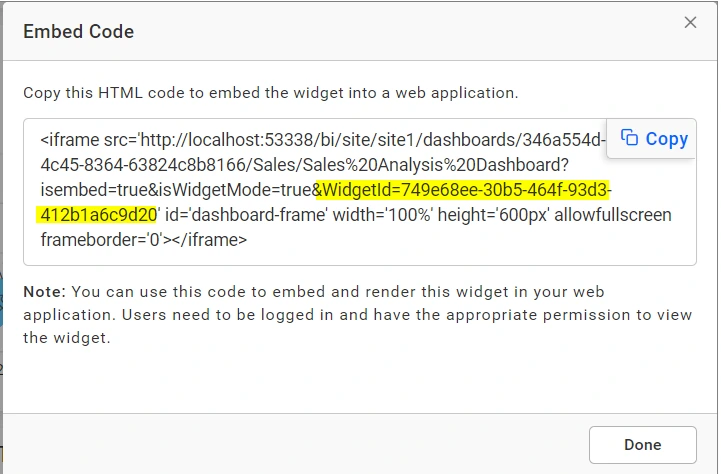
Getting Embed Code - Combine the widget ID and dashboard URL with the copied iframe code in the HTML page to render the widget as shown:
<body>
<head>
<iframe src='http://localhost:53153/bi/site/site1/dashboards/b5a2f2af-3ea9-4838-baa5-29b5111b5767/Sales/Sales%20Analysis%20Dashboard?isembed=true&isWidgetMode=true&WidgetId=32ed09f7-490f-4468-9c56-ccc376dbcaaa' id='dashboard-frame' width='100%' height='600px' allowfullscreen frameborder='0'></iframe>
</head>
</body>

Embed URL - Run the sample, the program displays either a login window or dashboard, requiring user login and valid credentials to render the widget.

Login to Bold BI - Finally, the embedded widget will be rendered as shown below.

Embedded Widget
You can also embed a widget into other web applications through single sign-on authentication. When attempting to embed using an iframe URL with a valid embedSignature, you can embed widgets without a login prompt.
I hope you’ve absorbed some valuable insights on how you can tap into the power of embed widgets to unlock fresh possibilities for businesses. By harnessing the ability to customize widgets, you can tailor them to seamlessly blend with your website’s design and enhance its functionality in your business. If you are new to Bold BI, we invite you to sign up for a free trial on our website.