
Bold BI Cloud Analytics Server v5.2 Released with Theming
Introduction
We are excited to announce that we upgraded our cloud-hosted analytics server for Bold BI® v5.2, which is a major release launched through our on-premise deployment packages.
You can see many enhancements and improvements in this cloud release for server, designer, widgets, data sources, and embedding. You can find all the details for each release listed in our release notes. With this release, we have two major details to share, let’s dive in to see them in details.
Theming
We provided a theming feature to customize a dashboard, an application server, and an identity management server with Dark or Light modes in both stand-alone and embedding scenarios.
How does this feature differ from the theming support available in previous versions?
Previous versions of Bold BI supported custom theming at the dashboard level only. With the new theming feature, you can apply themes at both the dashboard and application levels. Also, the new CSS3-formatted stylesheets allow easy testing and value correcting.
Application theming
Under the Administrator Settings option in the cloud site, you can find theme customization options under the Look and Feel tab. By default, a theme in Light mode is applied to your site.
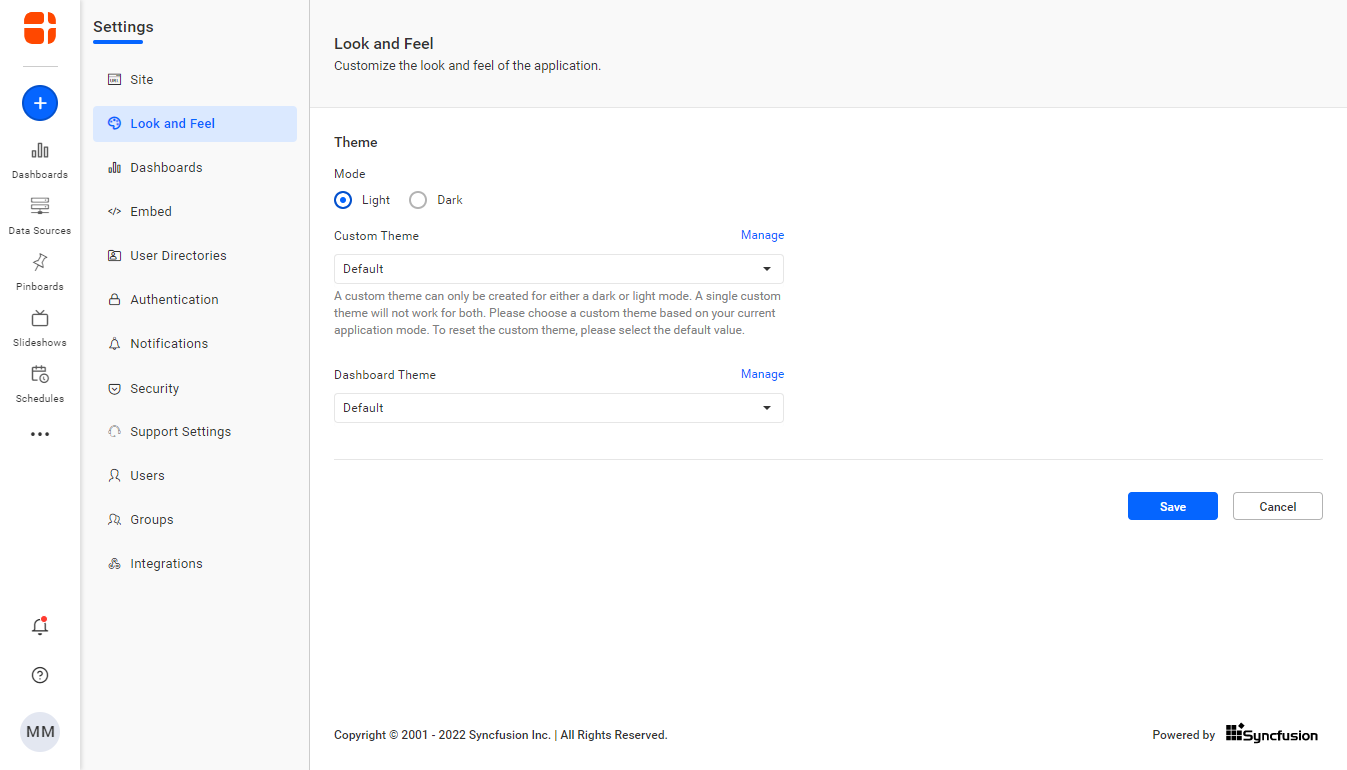
By switching the modes, you can customize the appearance of page elements including background, surface area, branding color, buttons, menus, and more. In the following image, you can see that the primary branding color we used by default is blue (with a mild color difference) in both Light and Dark modes.
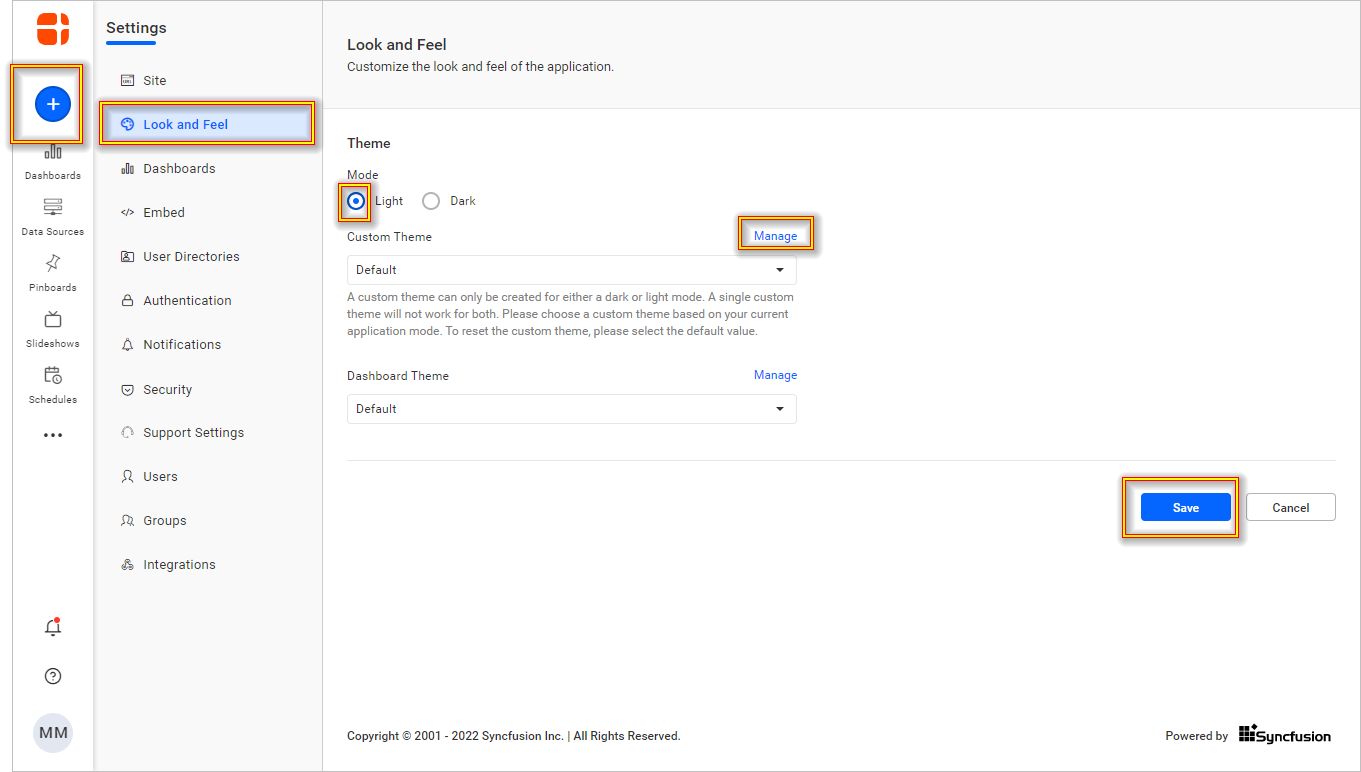
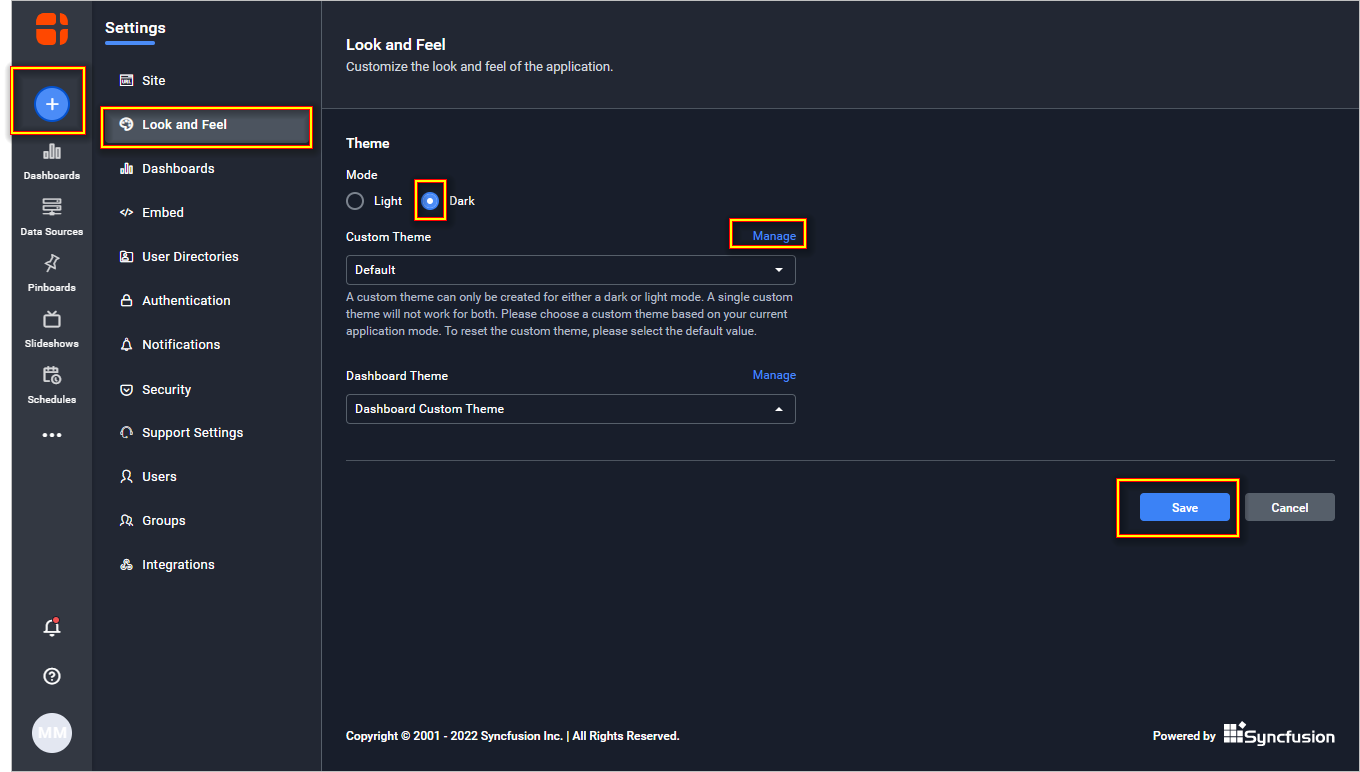
If you want to change the primary branding color, follow these steps:
- Click Manage near the Application Custom Theme setting.
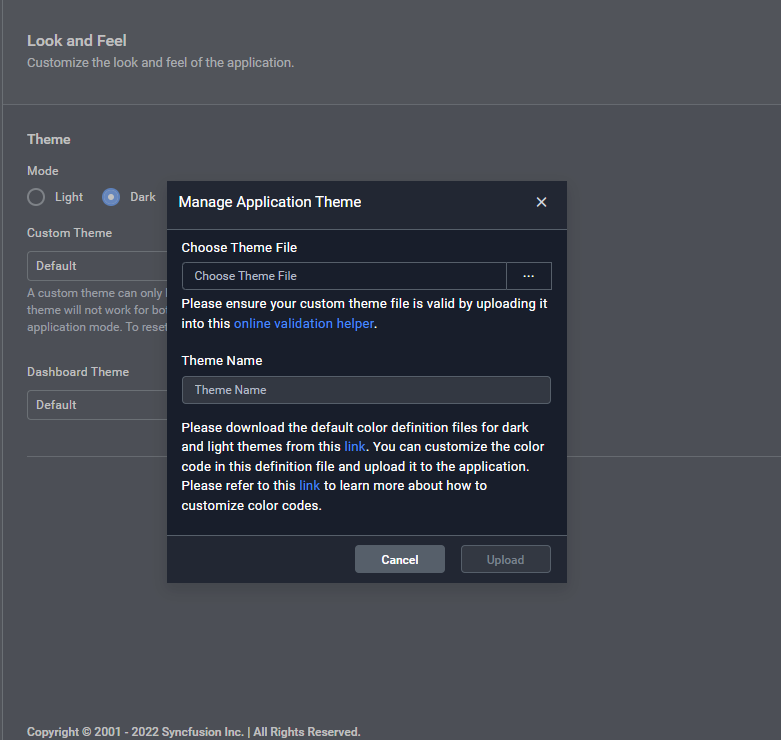
Manage Configuration View
- Download the theme template files by clicking the downloadable link in the configuration dialog (highlighted). Now, the zip file will be downloaded onto your application server.
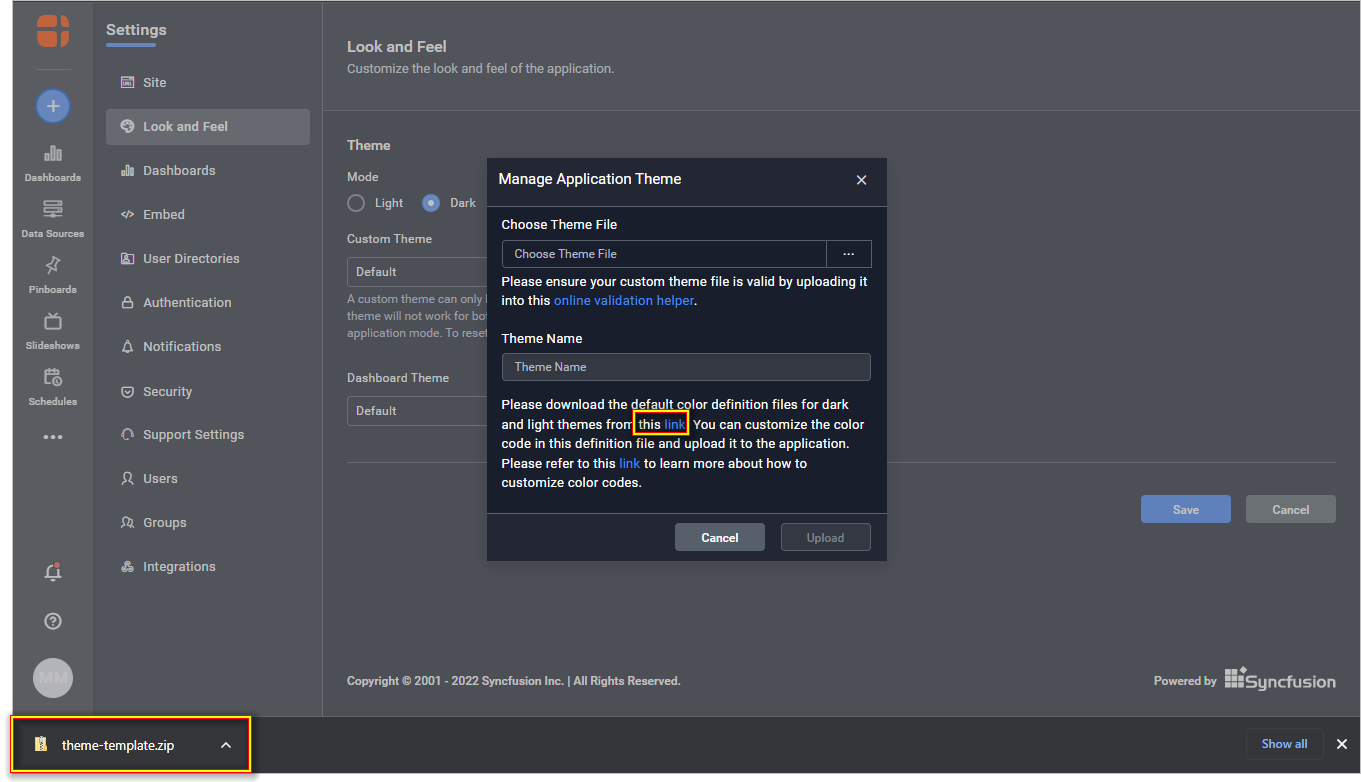
Theme Files Downloaded
- Open the required theme file and edit the color code near the color customization variable by setting primary-branding-color as #9c63ff. Then save it with a different name and upload it.
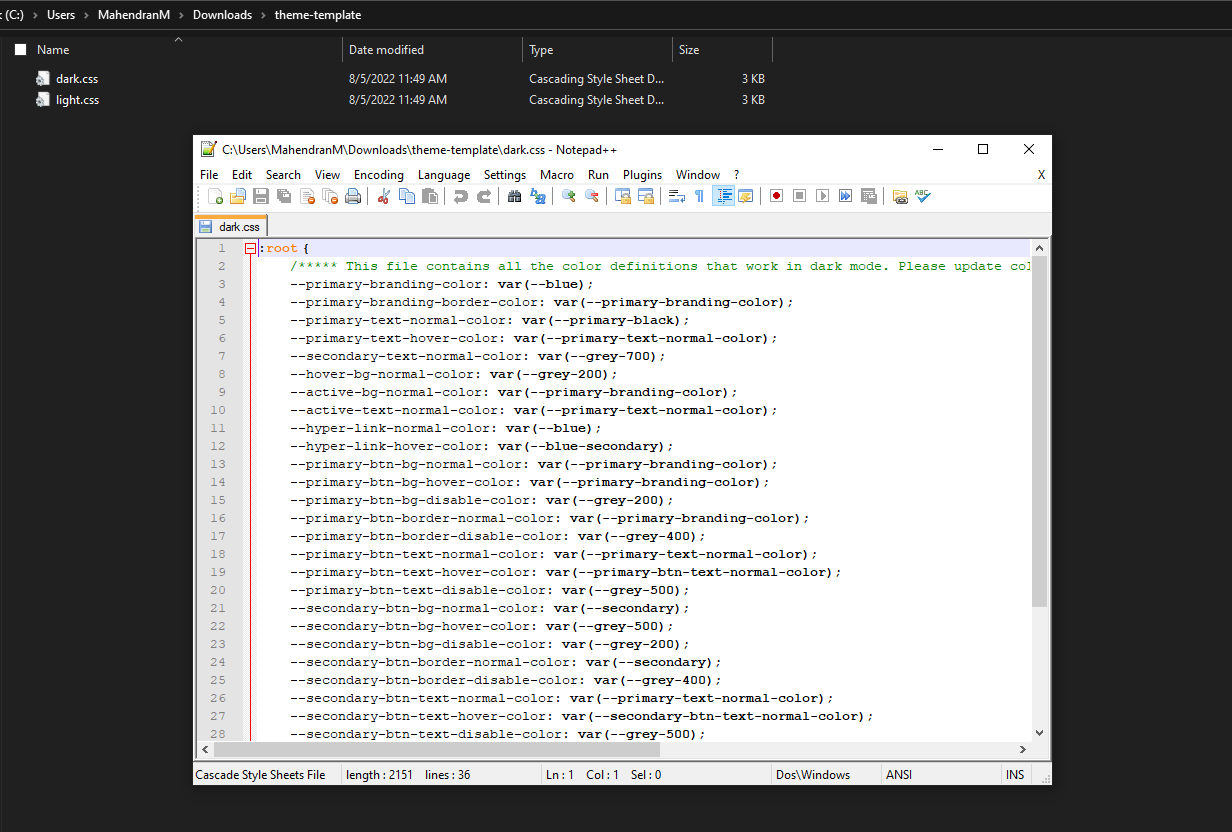
Dark Theme Edited with Violet Primary Branding Color
- Choose the uploaded file from the option Application Custom Theme and click Save.
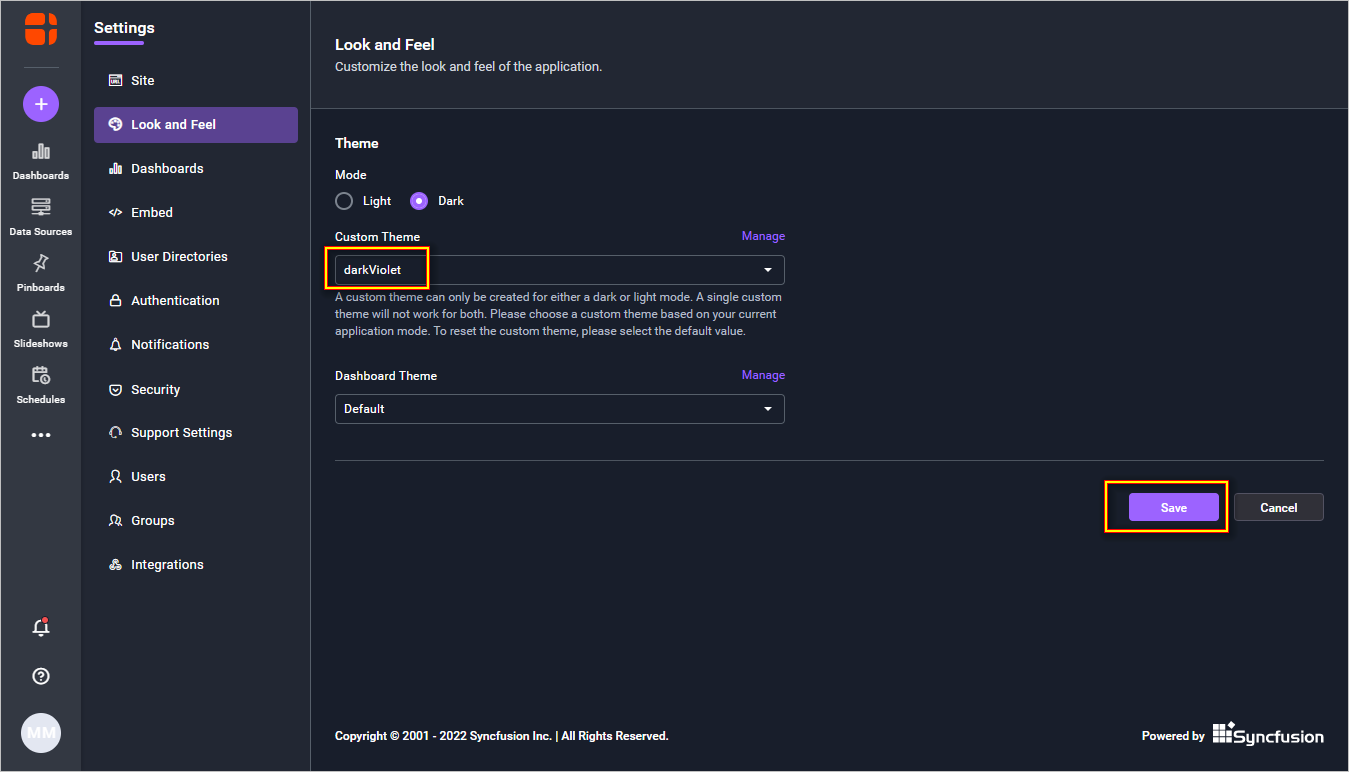
Saving Applied Violet Theme
- Once saved, refresh the site. You’ll find that the primary variant color has changed from blue to violet.
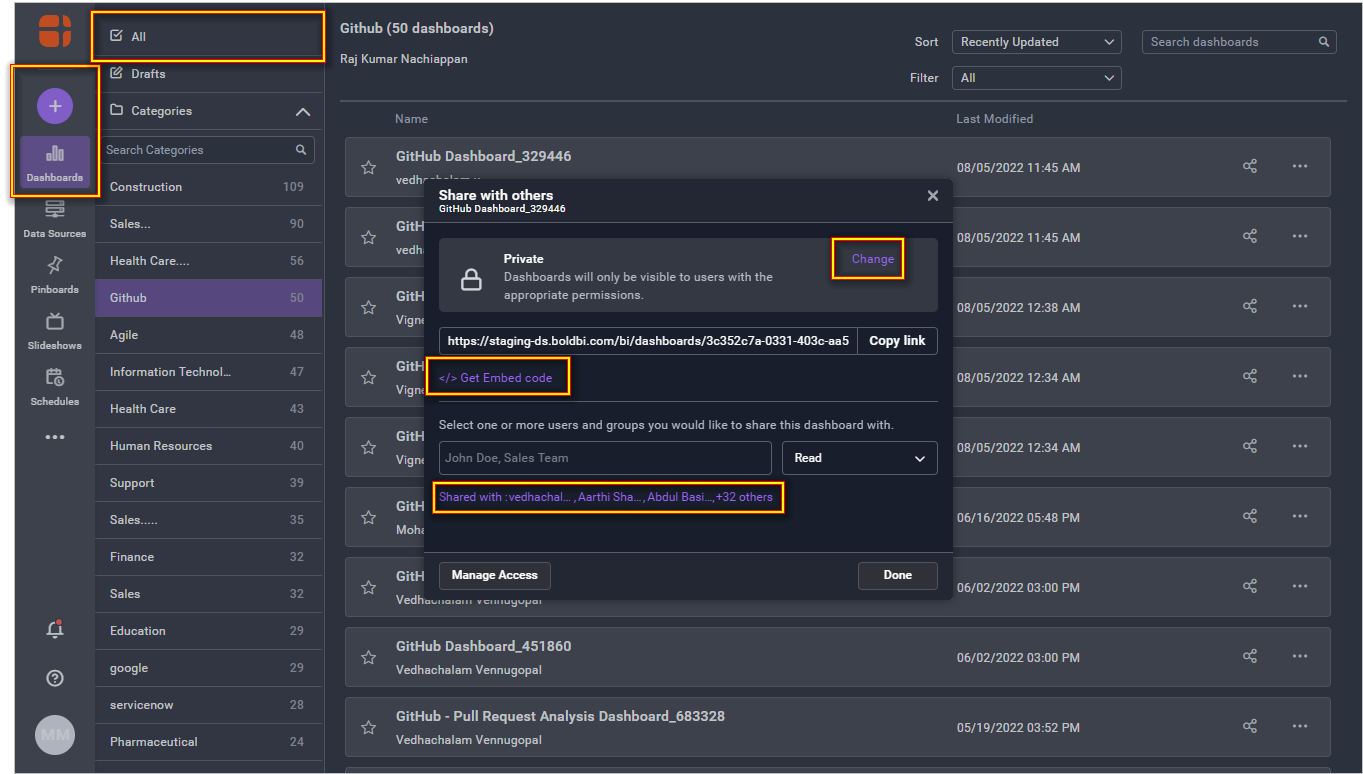
Application Primary Branding Color Changed to Violet on Homepage 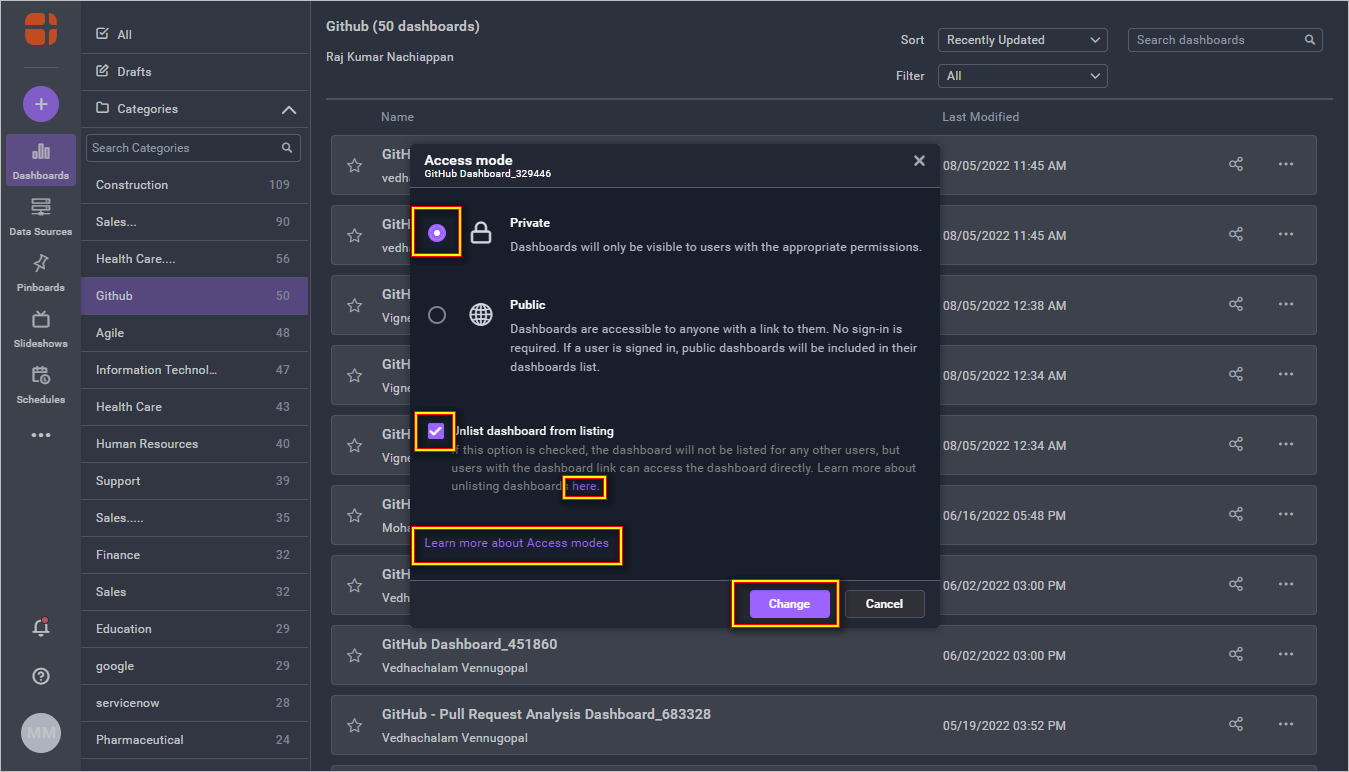
Application Primary Branding Color Changed to Violet in Access Mode Dialog
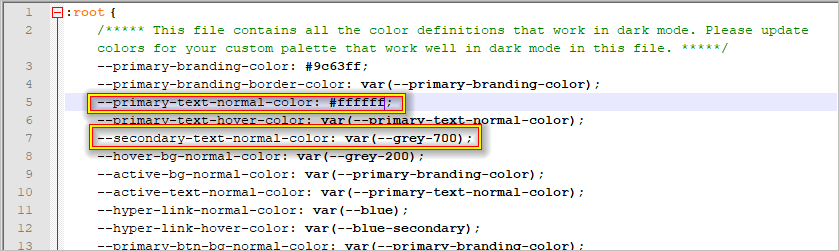
The following image highlights the primary and secondary color variables in the downloaded file.
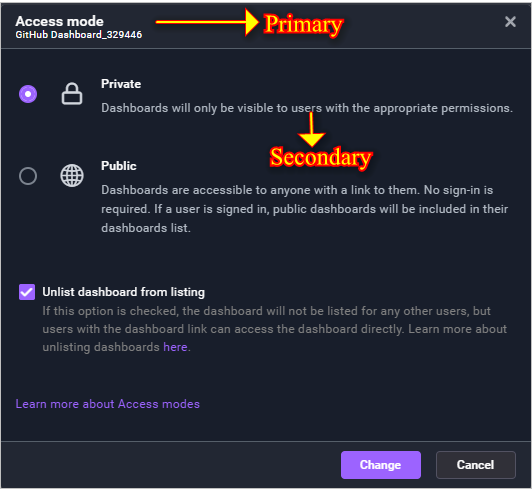
The following dialog reflects the changed variables.
Similarly, you can find many color customization variables—like Links, Links Hover, Buttons, Hover Background, Active Background, Active Text Color, Navigation Menu, and more—that can be customized in any mode (Light or Dark). You can find more details with examples on how to use each custom color variable in our documentation for custom application themes.
Dashboard theming
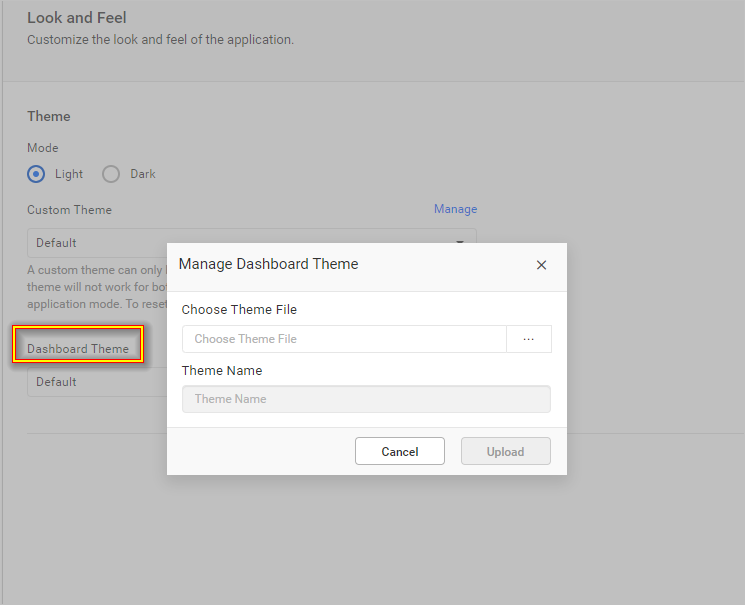
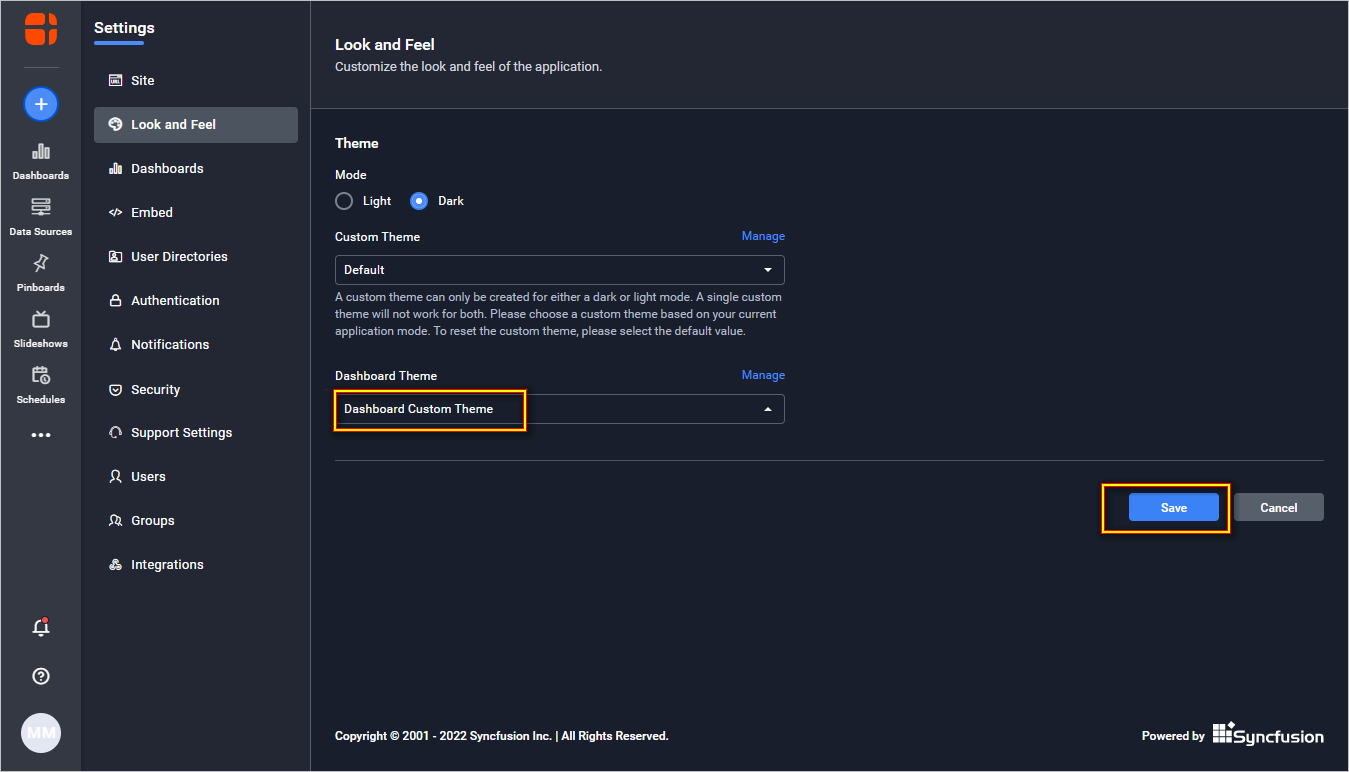
To apply a customized theme to your dashboards, edit and upload your customized theme file in Manage next to the Dashboard Theme option under the Look and Feel settings.
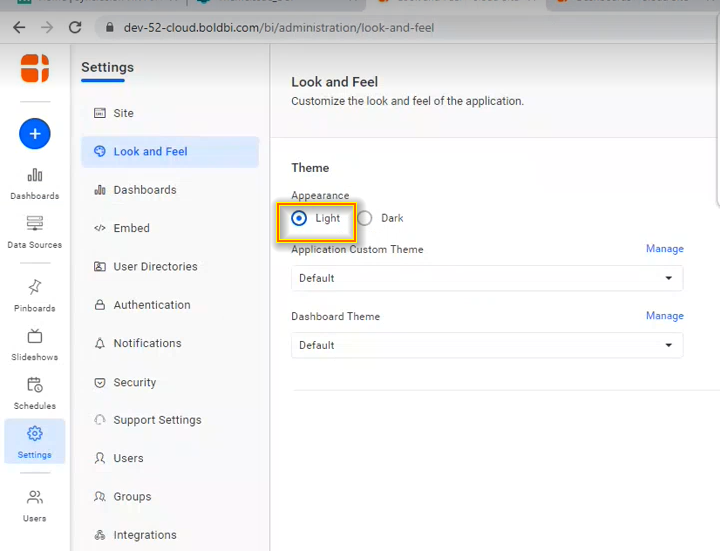
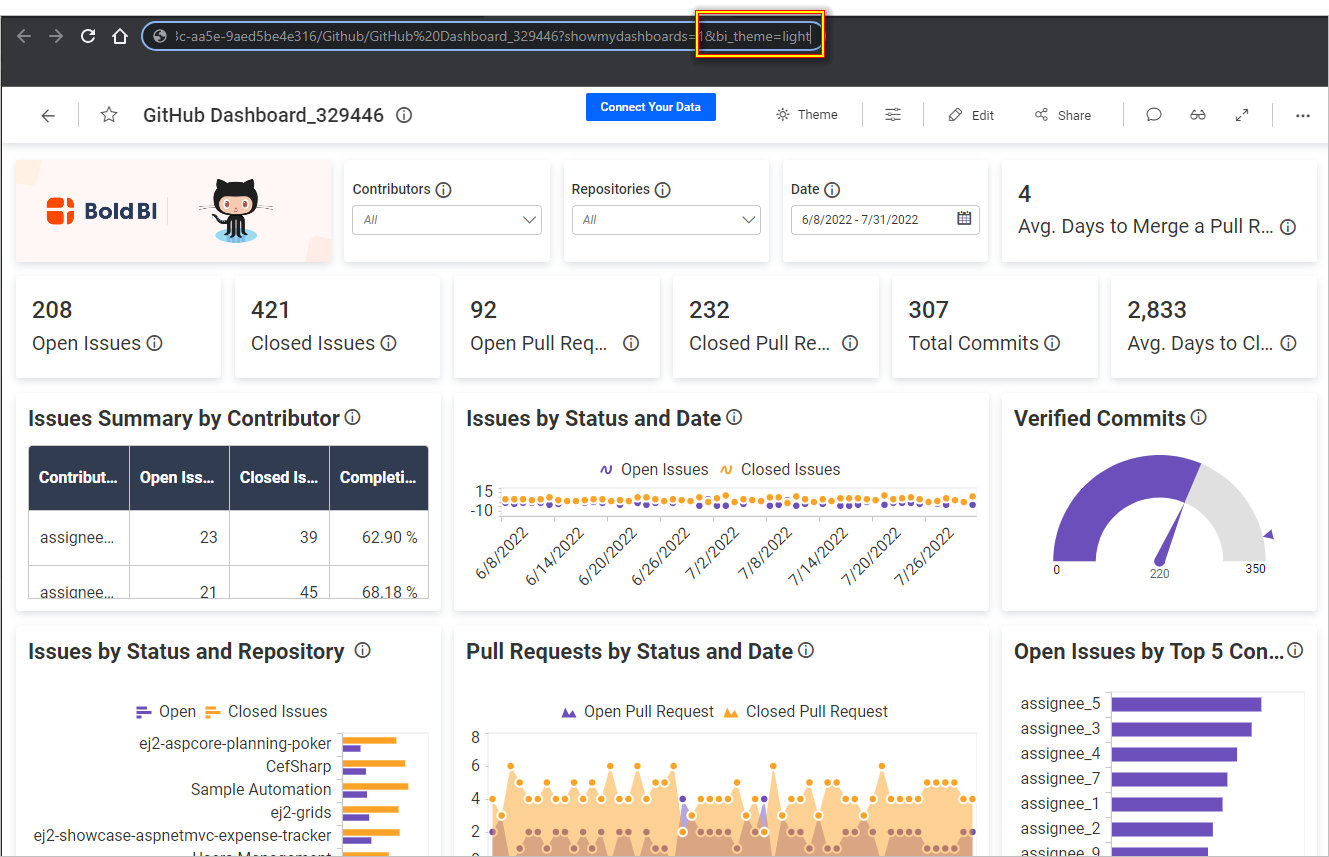
If you set the Light theme for the Appearance, that theme will be rendered in the dashboard view mode.
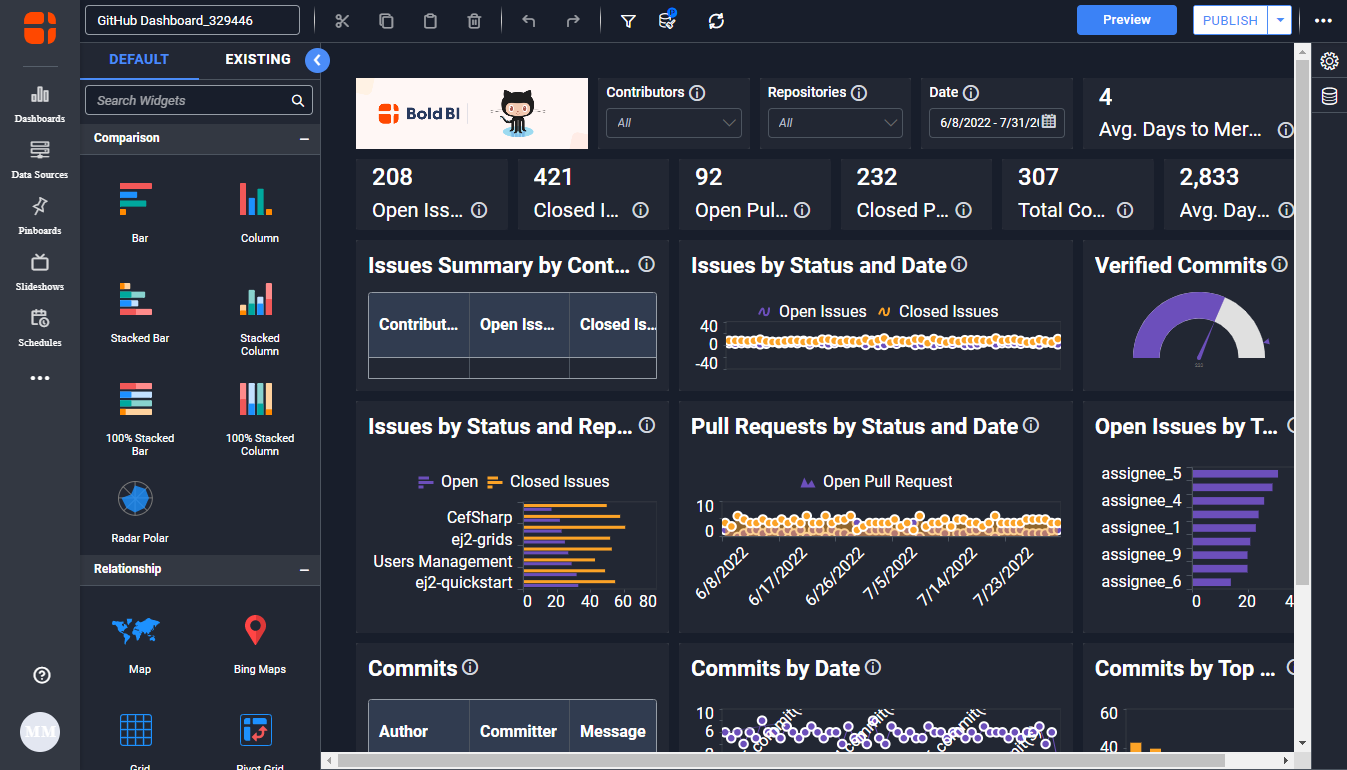
The case is similar for the dashboard designer preview mode and the query designer preview mode.
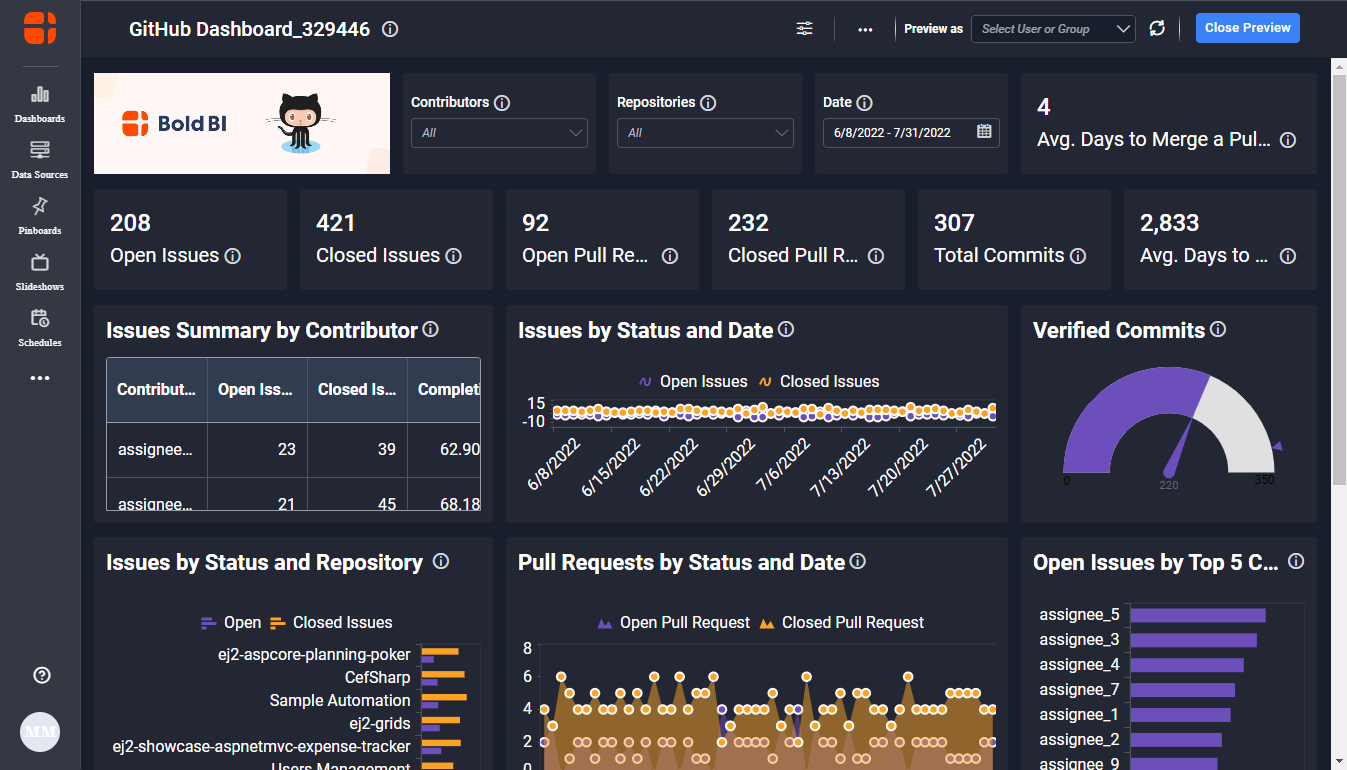
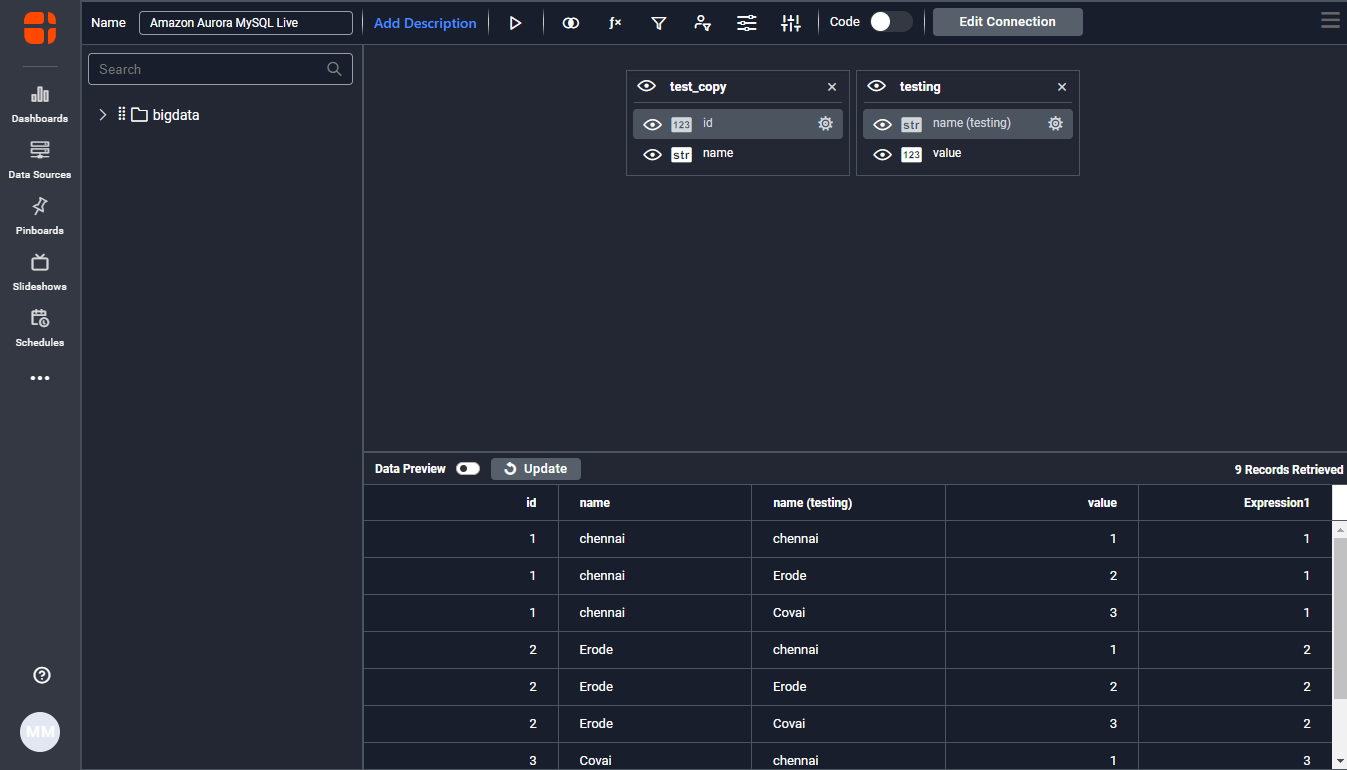
Save the settings for dashboard rendering.
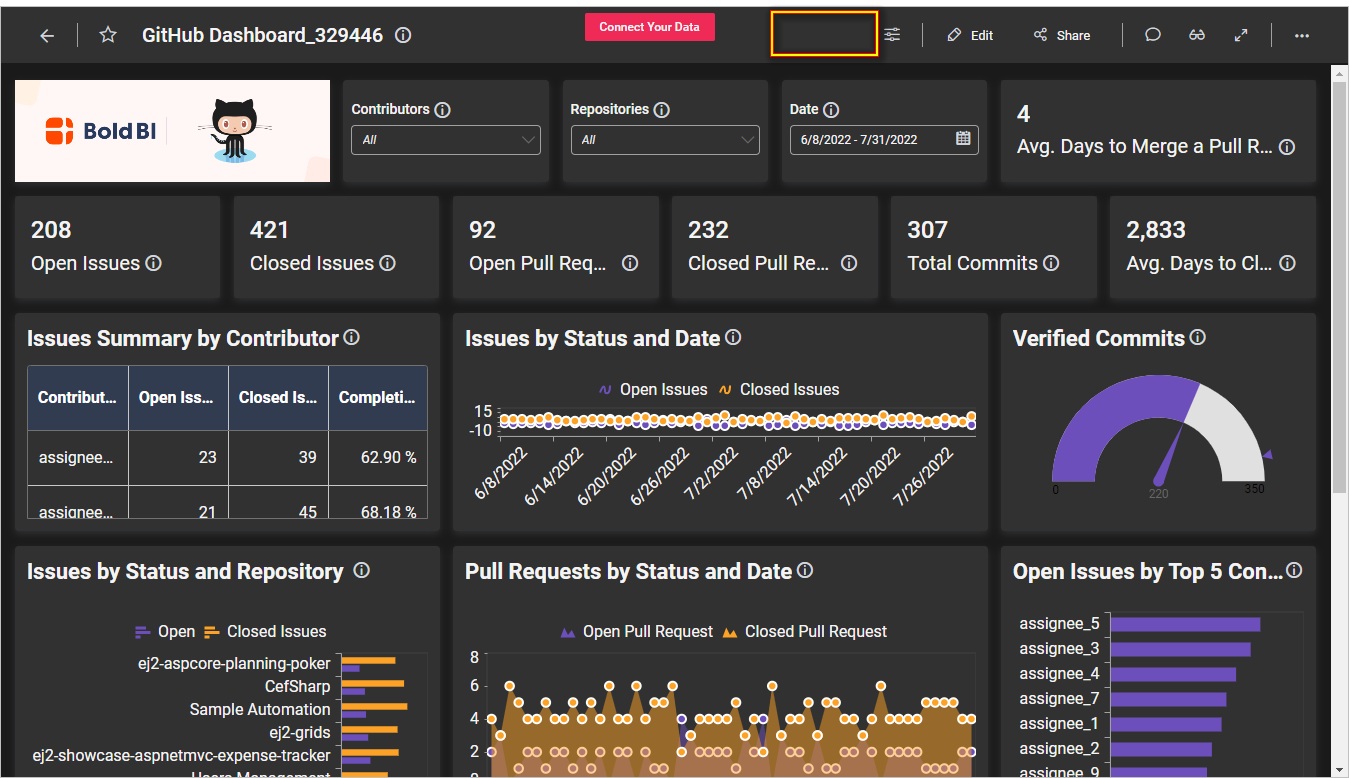
Note: If you apply custom theme settings, the Theme option from the dashboard view mode, which is available with previous versions, will be hidden automatically.
We have seen how to work with application server theming with basic examples. Refer to the GitHub Bold BI Theme Studio for the designer client that can be used to customize a theme. You can also find more details with examples on how to use each custom color variable in our documentation for custom dashboard themes.
Next, let’s see how theming can be configured in embedding scenarios.
Developer mode for embedding
Let’s assume you have created an embedding sample for a dashboard using any platform listed in the “Embedded SDK Samples” article. And let’s assume you’ve set the proper embed properties and created a Bold BI instance for embedding your dashboard.
To set theming options in the embedding sample, you need to create themeSetttings under the dashboardSettings property inside the Bold BI instance with default fields for appearance, application, dashboard, and isLocalTheme. The Bold BI instance will be initialized with themeSettings when you run the application using any platform. For example, you need to set the following:
- The appearance API. The value must be either Light or Dark.
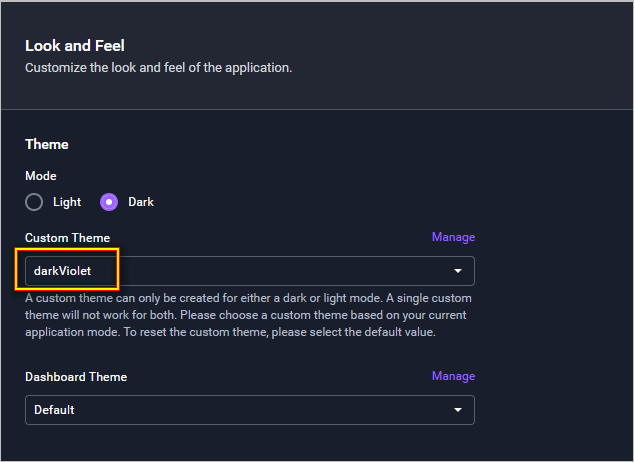
- The application API. The value must be either greenMist or darkviolet.
Note: This name is set in the server settings under the Look and Feel tab.
- The dashboard API. The value must be dashboardtheme or customTheme.
function renderDashboard() {
    var dashboard = BoldBI.create({
          serverUrl: rootUrl + '/' + siteIdentifier,
          dashboardId: "94ae3b51-34f7-473f-a791-ef6358e0fa79", //Id for dev-ds-52 site
          embedContainerId: "dashboard",
           width: "100%",
           height: "100%",
           exportSettings: {
                  showExcel: false,
                  showPDF: true,
                  showImage: false,
                  showCSV: true
          },
          dashboardSettings: {
                showHeader: true,
                themeSettings: {
                        appearance: "dark",
                        application: "theme",
                        dashboard: "dashboardTheme",
                         isLocalTheme: true
                }
          },
          authorizationServer: {
                url: authorizationServerUrl
           },
           disableAutoRecover: false
 });
 dashboard.loadDashboard();
 };
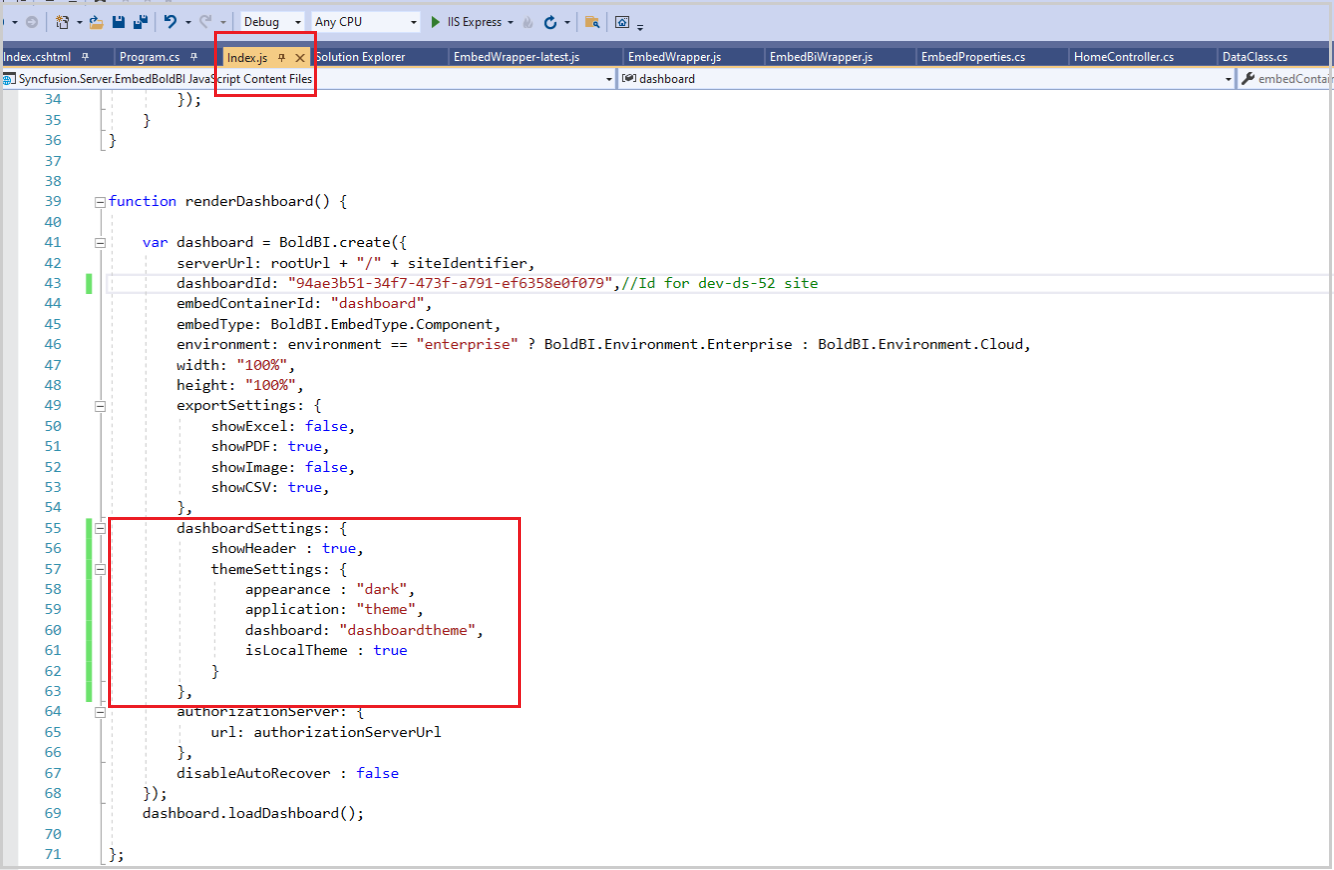
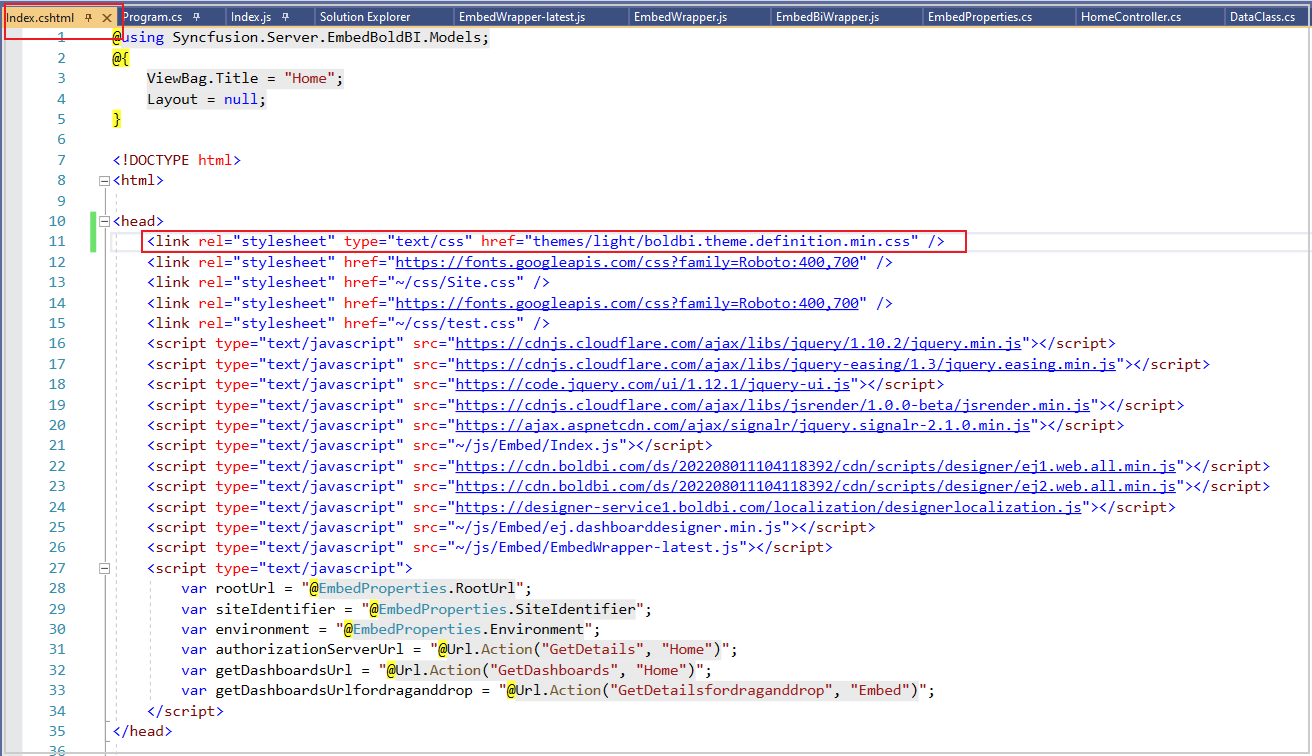
If referring to the theme file locally, isLocalTheme should be true; otherwise, it should be false. In the following screenshot, you can see an example of isLocalTheme referring when you set the true option to use the highlighted theme file.
@using Syncfusion.Server.EmbedBoldBI.Models;
@{
    ViewBag.Title = "Home";
    Layout = null;
}
<!DOCTYPE html>
<html>
<head>
<link rel="stylesheet" type="text/css" href="themes/light/boldbi.theme.definition.min.css" />
<link rel="stylesheet" href="https://fonts.googleapis.com/css?family=Roboto:400,700" />
<link rel="stylesheet" href="~/css/Site.css" />
<link rel="stylesheet" href="~/css/test.css" />
<script type="text/javascript" src="https://cdnjs.cloudflare.com/ajax/libs/jquery/1.10.2/jquery.min.js"></script>
<script type="text/javascript" src="https://cdnjs.cloudflare.com/ajax/libs/jquery-easing/1.3/jquery.easing.min.js"></script>
<script type="text/javascript" src="https://code.jquery.com/ui/1.12.1/jquery-ui.js"></script>
<script type="text/javascript" src="https://cdnjs.cloudflare.com/ajax/libs/jsrender/1.0.0-beta/jsrender.min.js"></script>
<script type="text/javascript" src="https://ajax.aspnetcdn.com/ajax/signalr/jquery.signalR-2.1.0.min.js"></script>
<script type="text/javascript" src="https://cdn.boldbi.com/ds/20220811101411/cdn/scripts/designer/ej1.web.all.min.js"></script>
<script type="text/javascript" src="https://cdn.boldbi.com/ds/20220811101411/cdn/ej2.web.all.min.js"></script>
<script type="text/javascript" src="https://serviceurl.boldbi.com/localization/designerlocalization.js"></script>
<script type="text/javascript" src="~/js/Embed/ej.dashboard.designer.min.js"></script>
<script type="text/javascript" src="~/js/Embed/EmbedWrapper-latest.js"></script>
<script type="text/javascript">
        var rootUrl = "@EmbedProperties.RootUrl";
        var siteIdentifier = "@EmbedProperties.SiteIdentifier";
        var environment = "@EmbedProperties.Environment";
        var authorizationServerUrl = "@Url.Action("GetDetails", "Home")";
        var getDashboardsUrl = "@Url.Action("GetDashboards", "Home")";
        var getDashboardsUrlforDraganddrop = "@Url.Action("GetDetailsfordraganddrop", "Embed")";
</script>
</head>
</html>
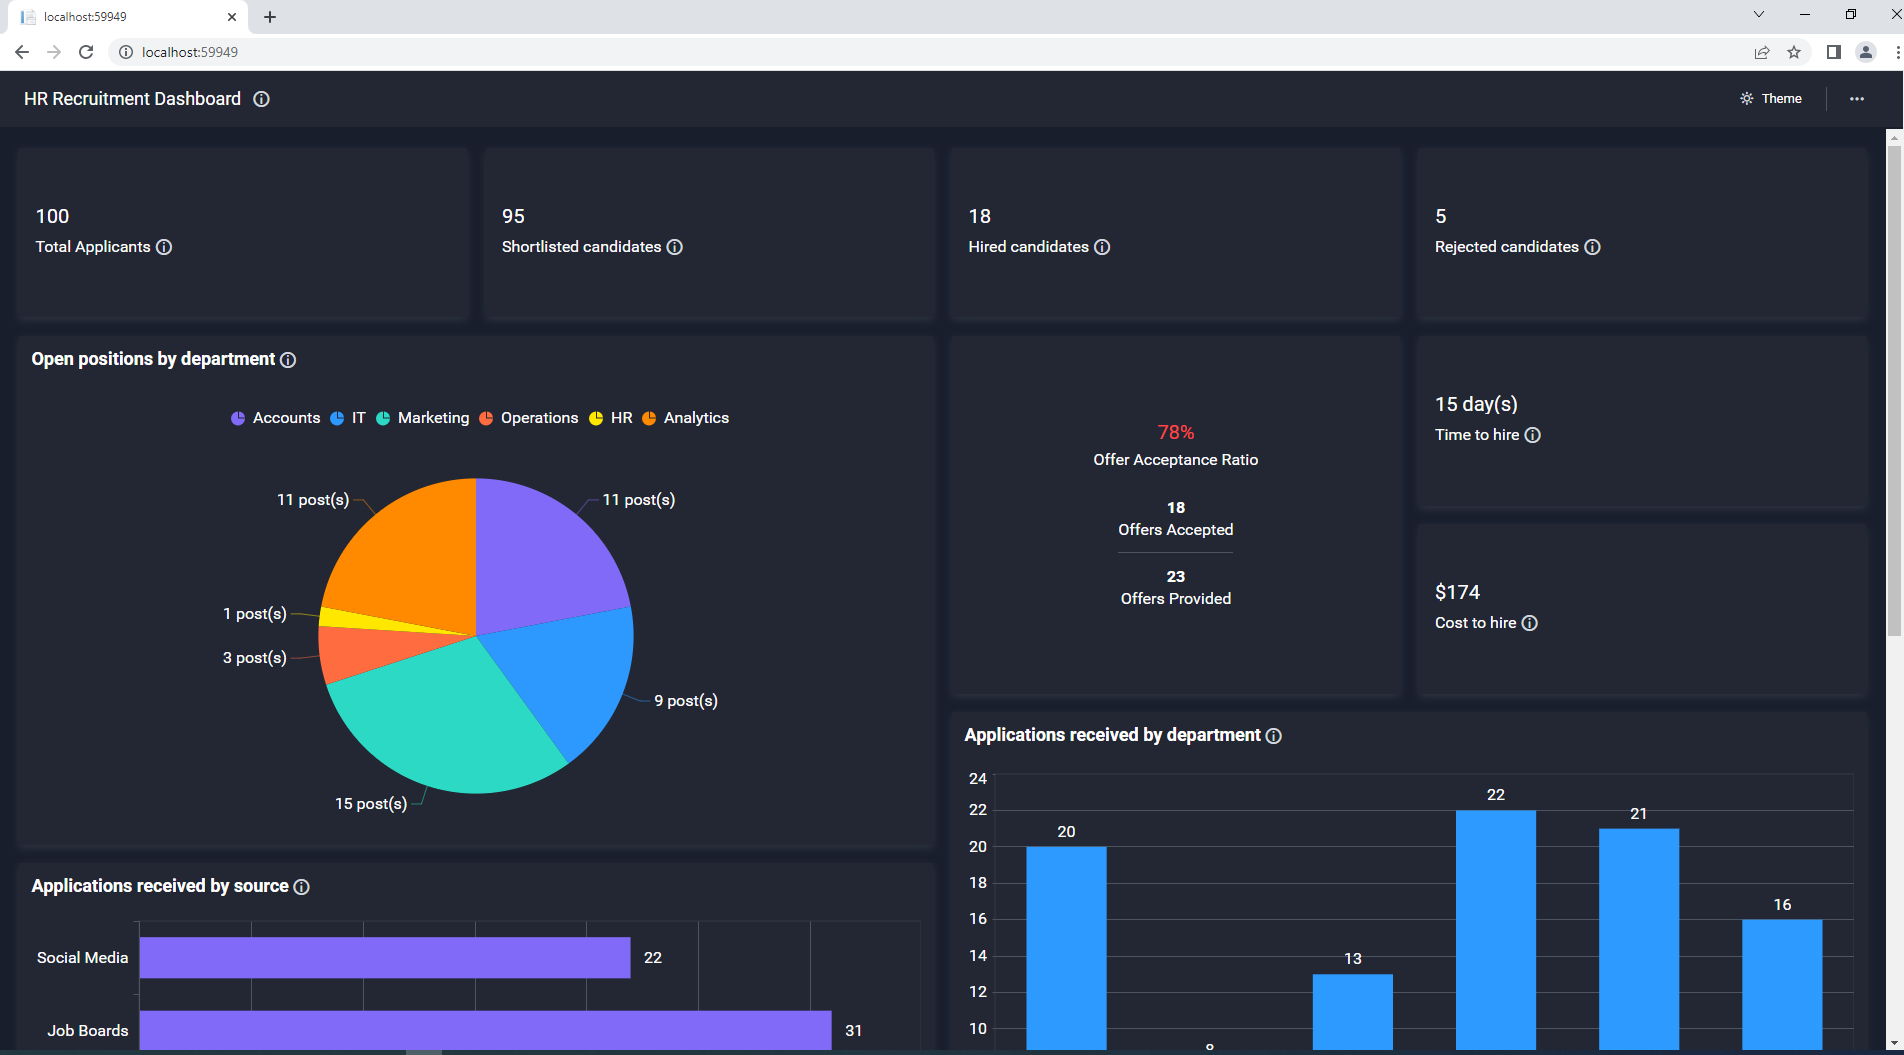
Once you set themeSettings properly and run your embedded application, the corresponding theme file set in the Bold BI instance will download the theme css file and apply it to the dashboard in your embedded application when you run it in your local browser. You can see sample output in the following screenshot.
We have seen the embedded theming support provided in this release with simple, illustrative details. Now, you can customize and generate a custom theme file using the steps given in the Bold BI Theme Studio.
Get that file from the assets folder and refer to it in your embedded application. For creating custom theming in your application, please refer our documentation that covers how to apply a custom theme in your Bold BI embedded application.
Now, let’s see about IP addresses to add to your allowlist.
Adding IP addresses for your allowlist
In this release, we have migrated a few of our services from Azure app service to the Kubernetes environment to give our customers a seamless experience with our cloud analytics server application. Hence, the outgoing IP addresses for our cloud environment will change due to this migration. If your databases or services are running behind a firewall, please take note of the following IP address changes and add them to your allowlist.
34.71.204.150
34.136.243.157
34.172.244.28
35.238.71.246
35.184.203.162
The following IP addresses are no longer valid after August 10, 2022.
52.234.231.3
52.234.229.253
52.234.228.68
52.234.209.94
52.234.228.143
52.234.230.214
52.234.224.254
52.234.225.60
Conclusion
We hope this article gives you a summary of the theming feature included in this update and details about IP addresses to note. This new theming feature will be available in our on-premise deployment packages as well in next two weeks through a service-pack update.
Get started with Bold BI® by signing up for a free trial or request a 30-minute demo and create interactive business intelligence dashboards. If you have any questions or need clarification, please use the comments section. You can also contact us by submitting your questions on the Bold BI contact page, or if you already have an account, you can submit your support question.